

How We 3D Printed a Custom Roof Adapter to Install Our Maxxair Fan
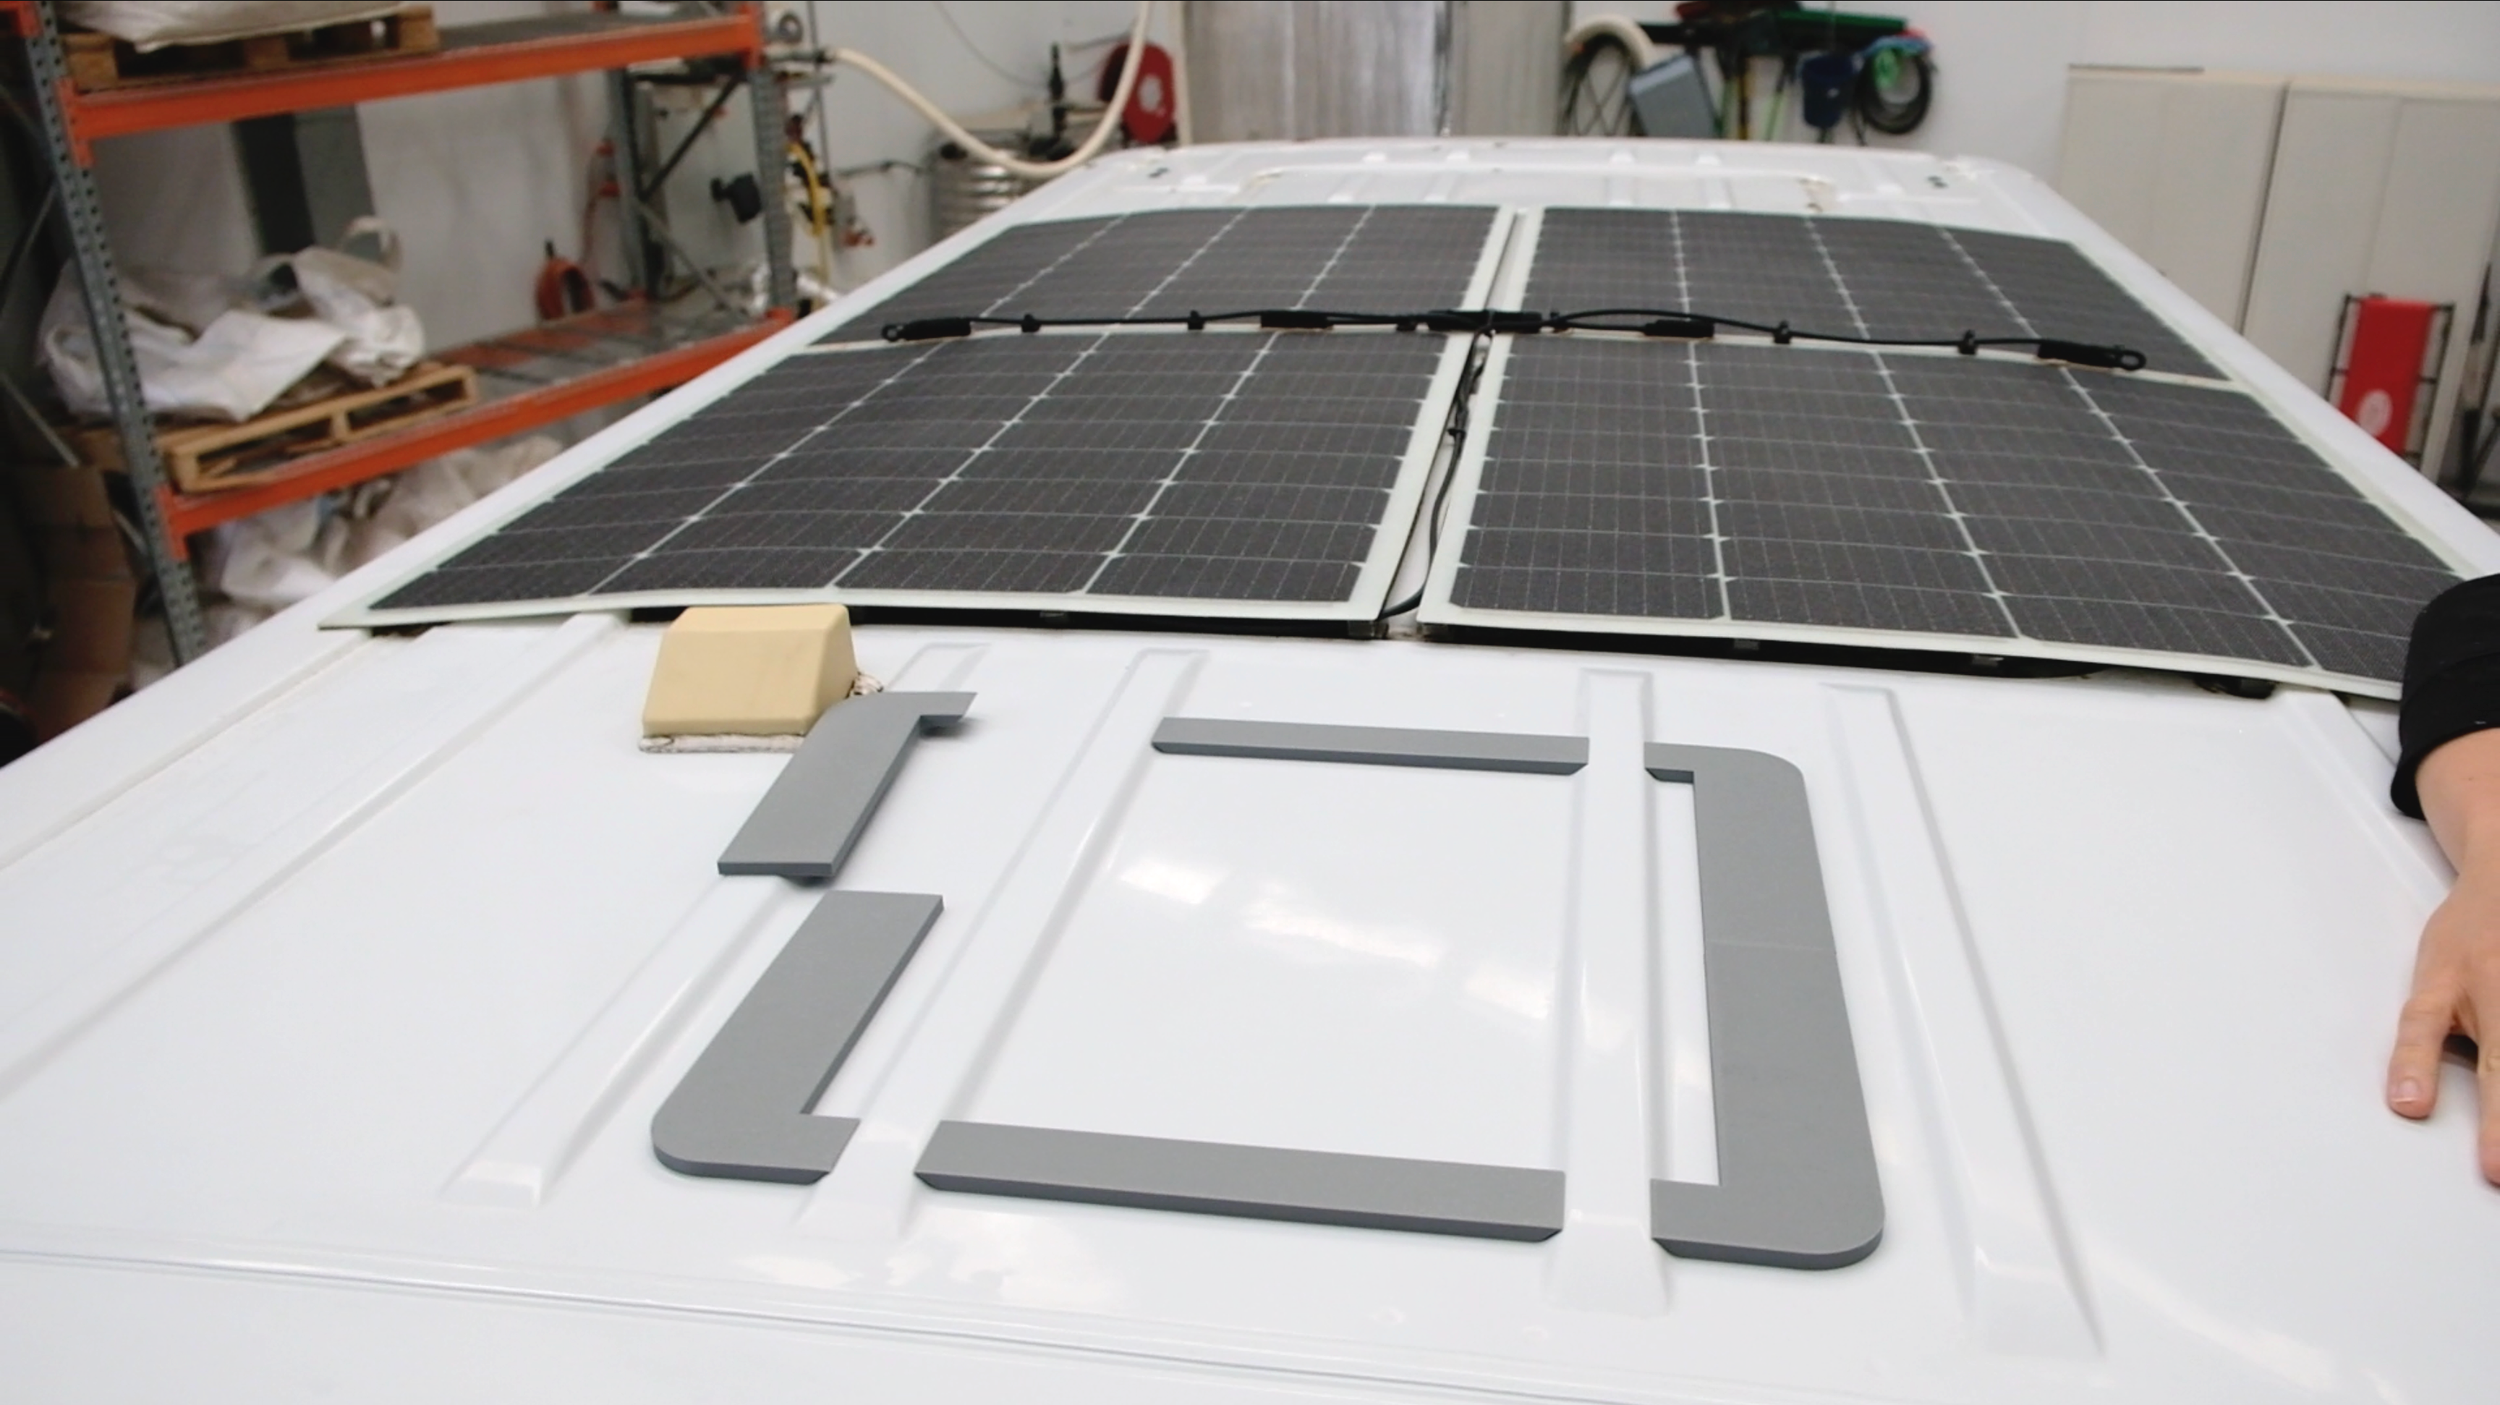
Table of Contents
Why 3D print a roof adapter for a van?
Designing our 3D roof adapter
Printing our 3D roof adapter
Installing a 3D roof adapter
Try 3D printing for yourself
Our fan installation video
STL file
If you’re installing a fan in your van build, the last thing you want is a leak.
But a van roof is never flat, making it difficult to mount your fan properly on the uneven surface.
The simple solve is to buy a roof adapter to level out the roof so that your fan sits flush, reducing the chance of water getting in.
But if you’re like us, you struggled to find a fan roof adapter that fits your van. And there is no one size fits all roof adapter.
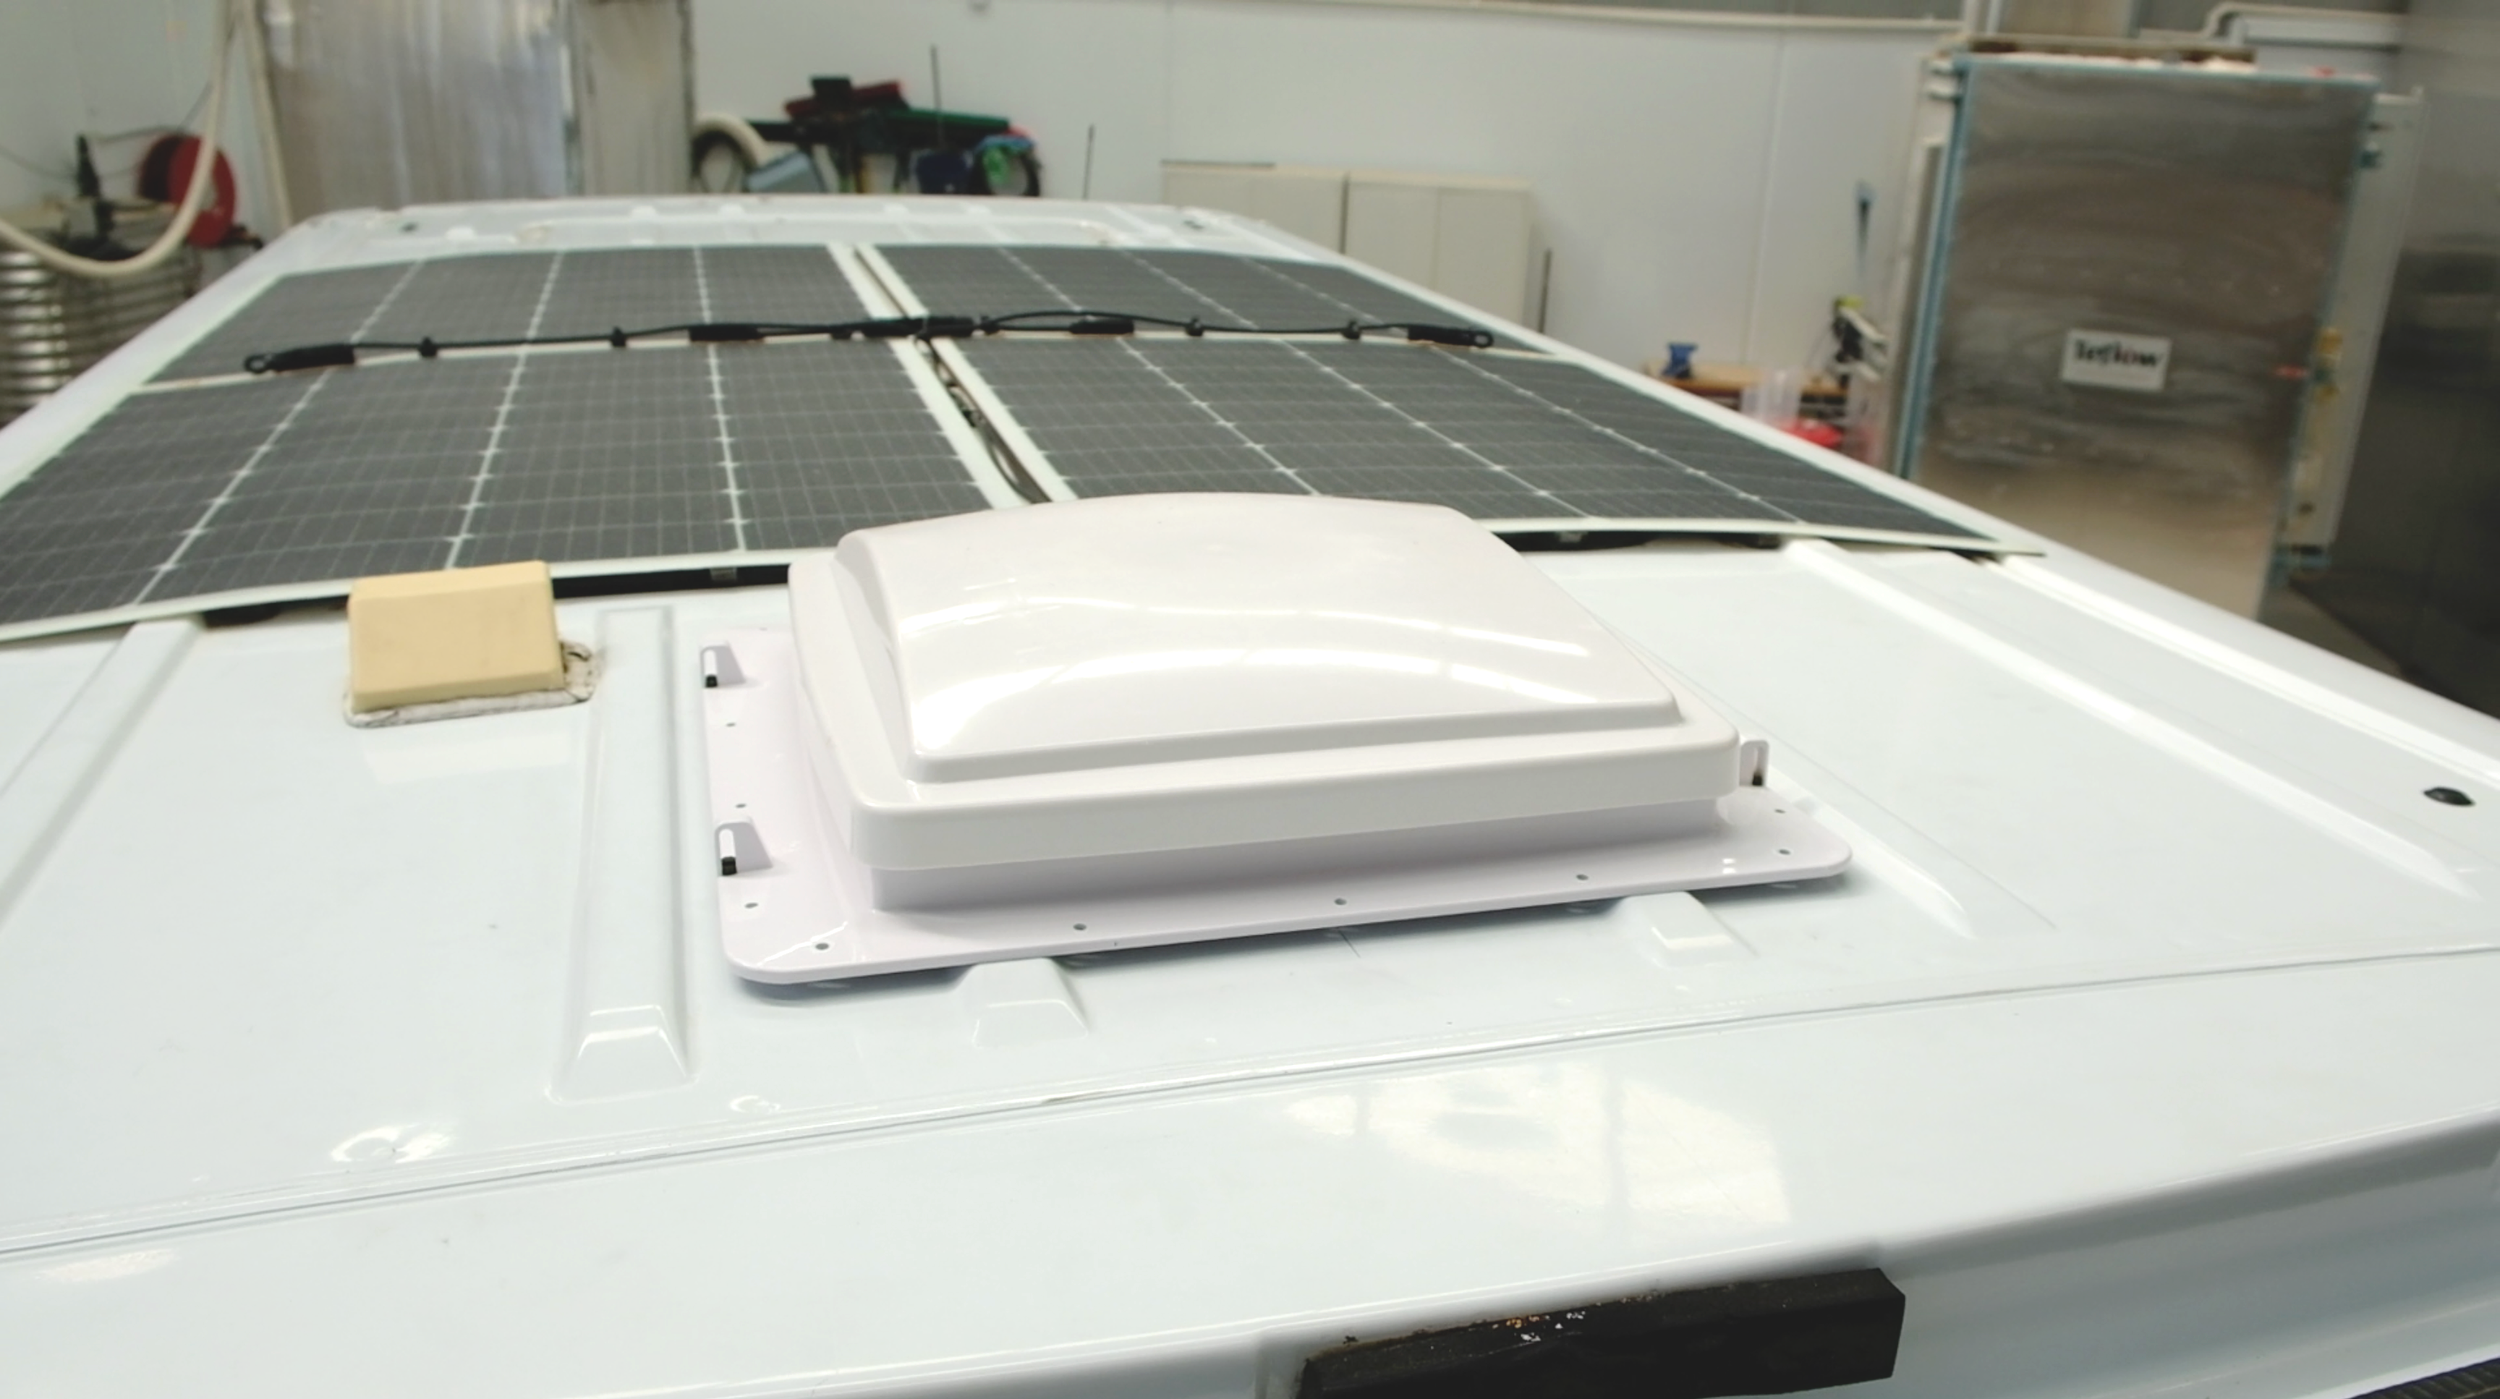
To get around this, we designed and 3D printed our own custom roof adapter. And we used it to install a Maxxair fan in our Renault Master van.
WHY 3D PRINT A ROOF ADAPTER FOR A VAN?
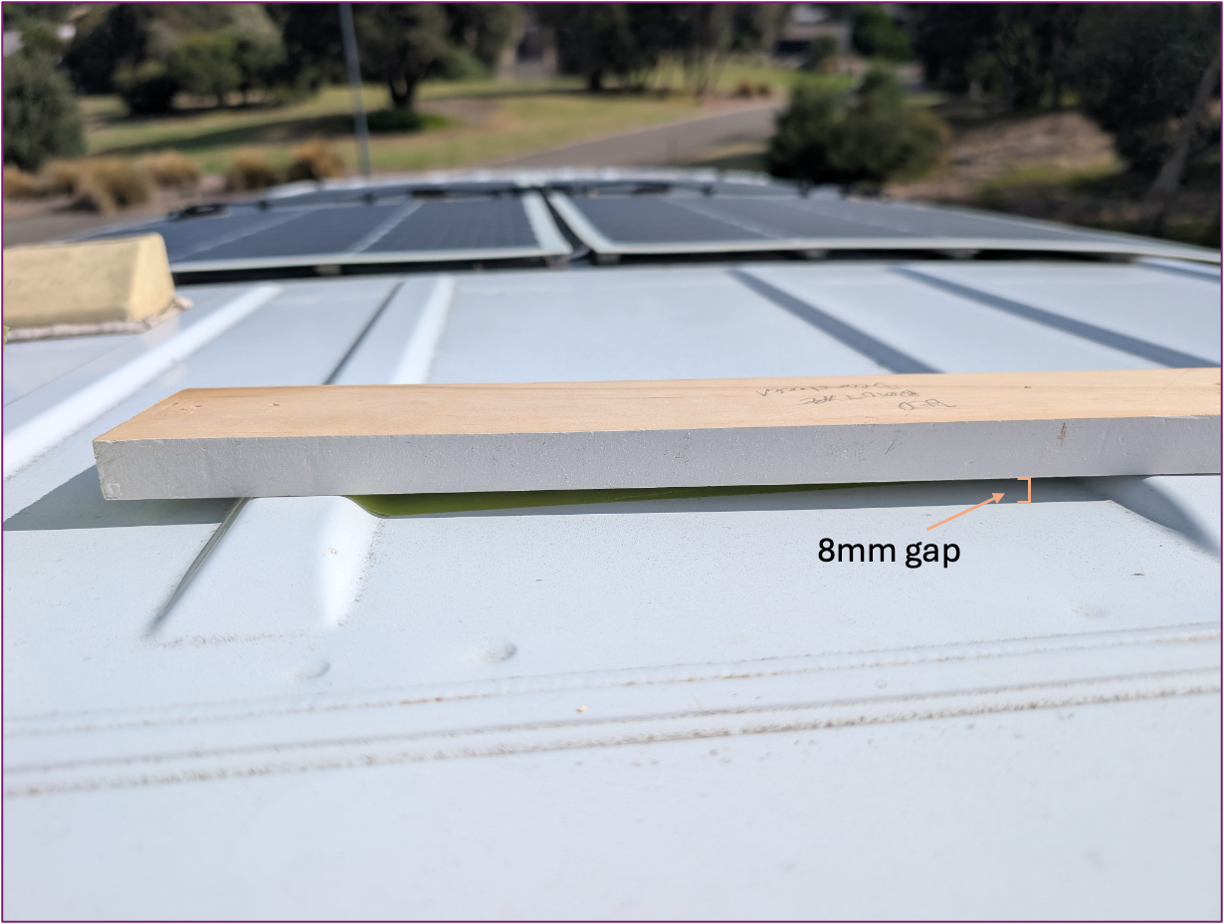
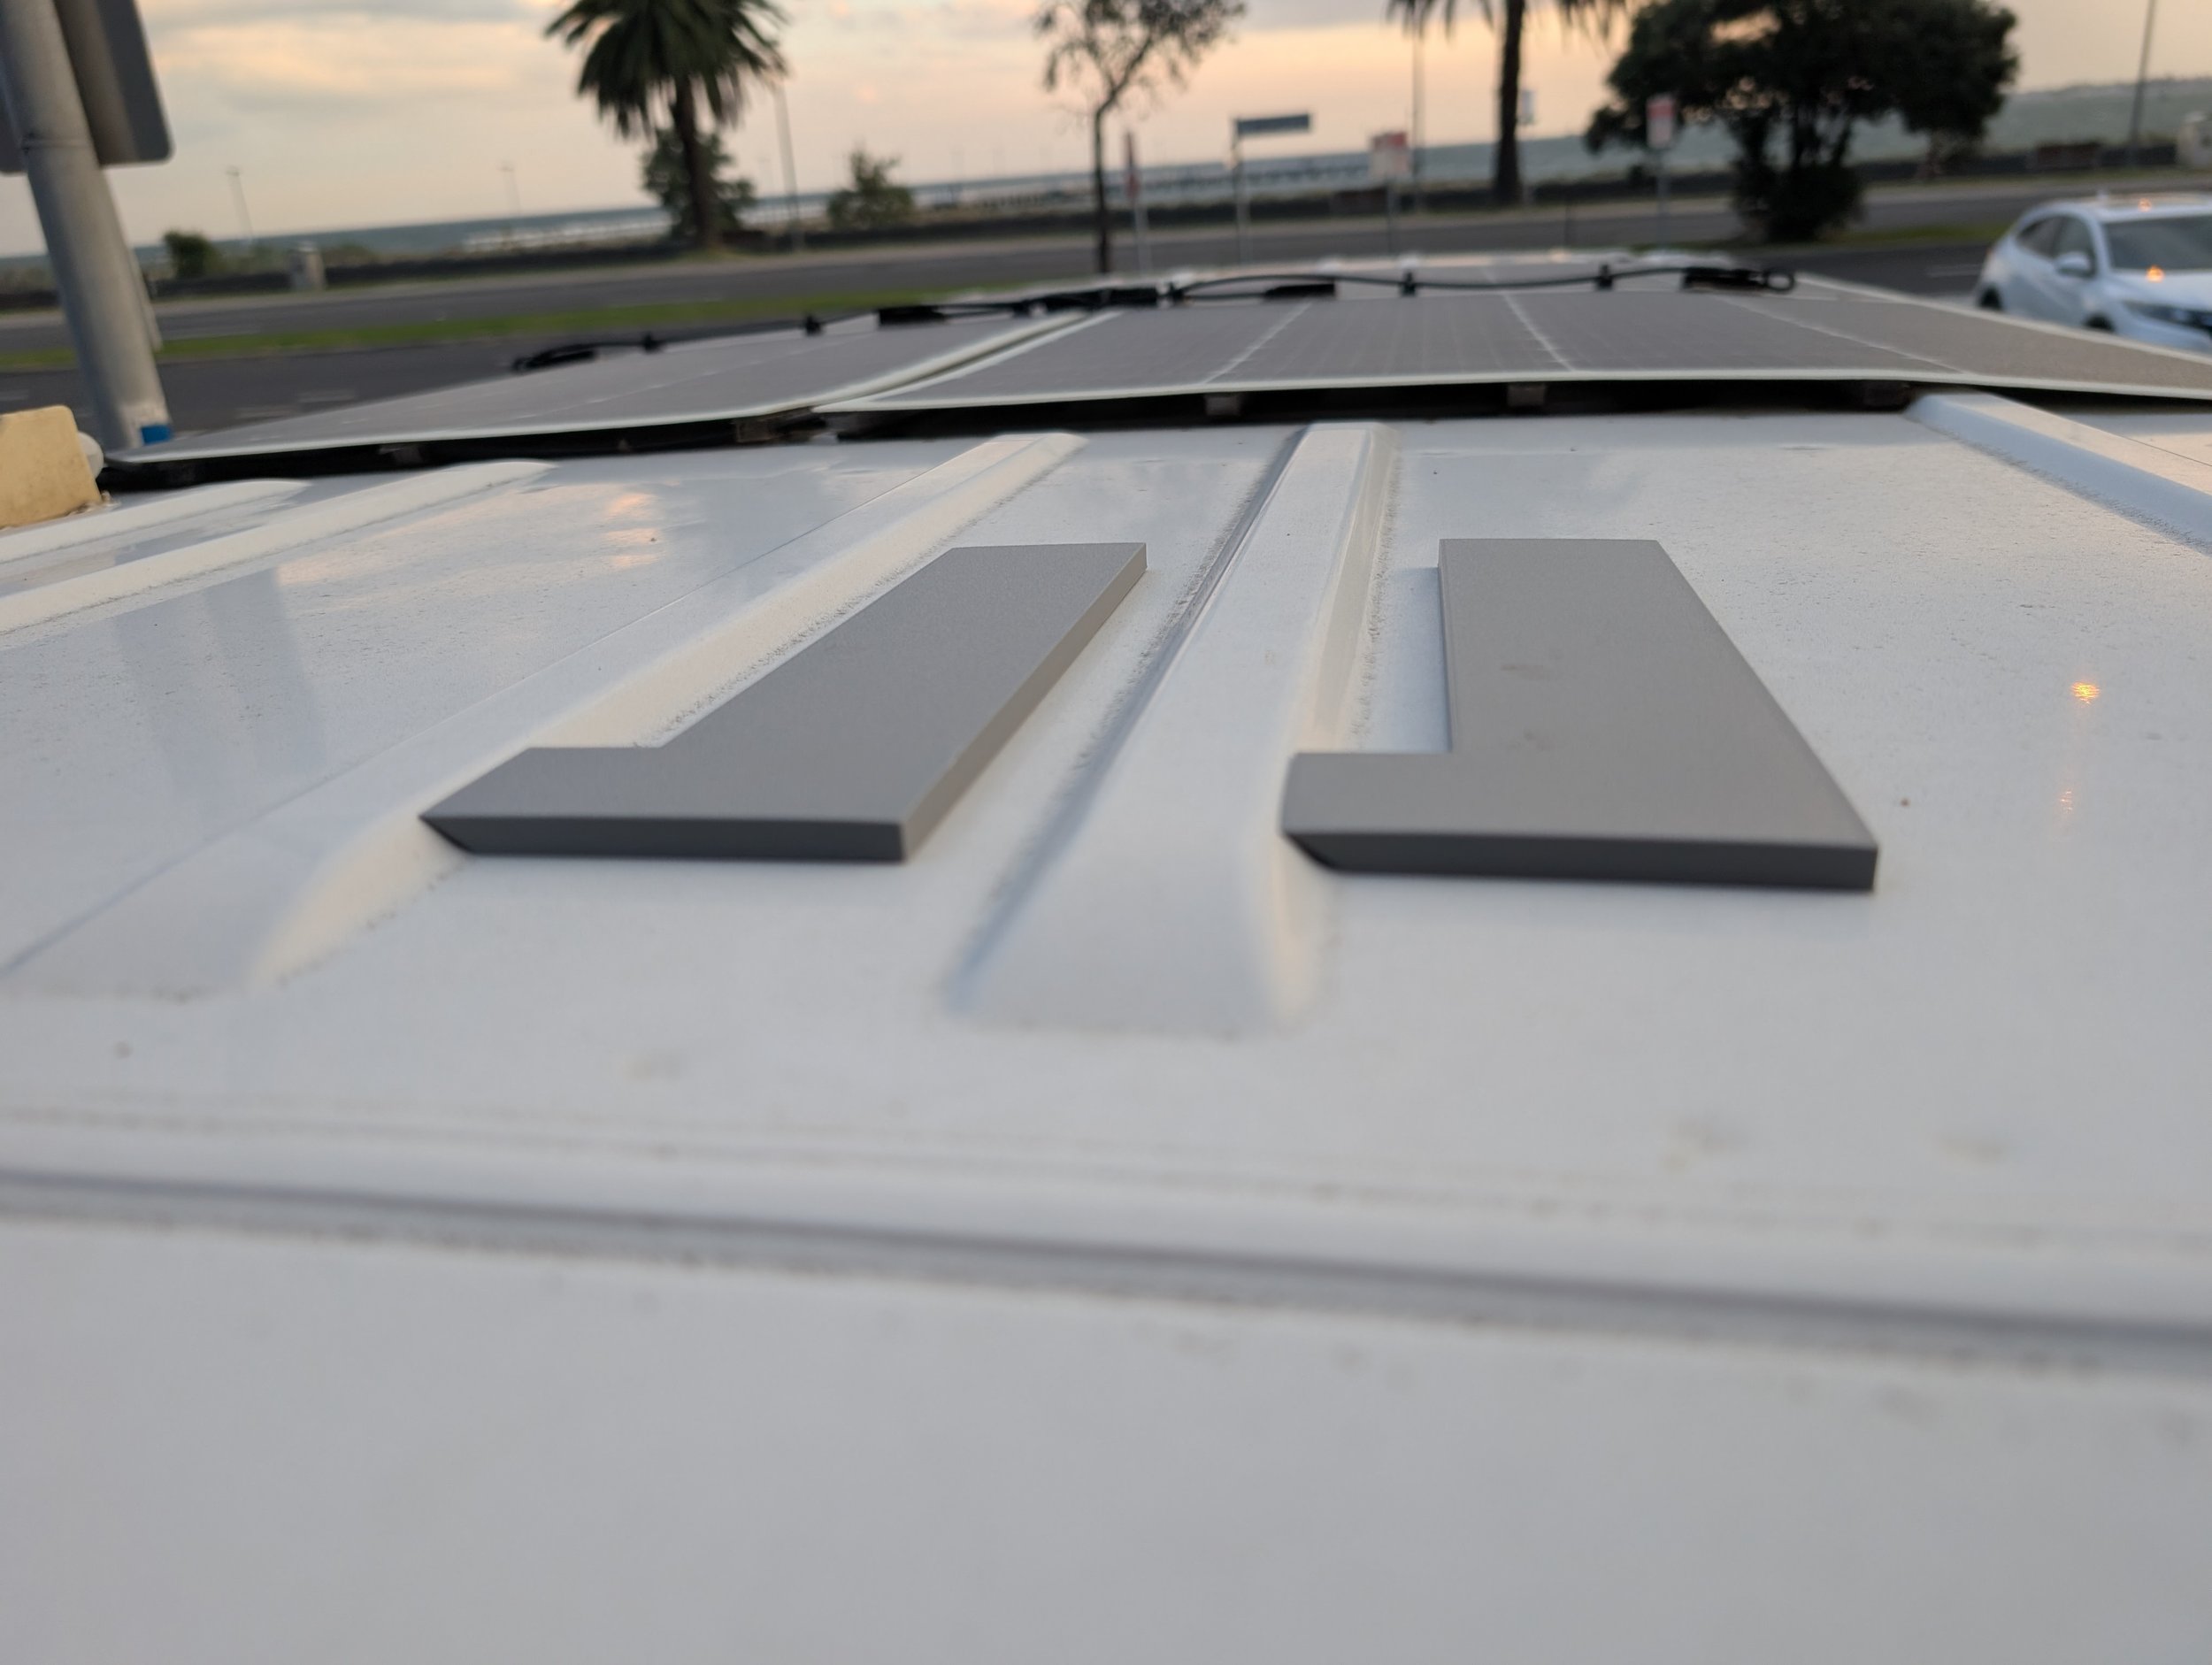
Without an adapter, our fan would have been sitting on 2 narrow ribs with only 4 points of contact creating an 8mm gap almost the whole way around the fan.
This would cause two issues:
Waterproofing:
Filling such a large gap with a mountain of butyl tape didn’t seem like the most reliable way to prevent leaks, even though it probably would have been fine.
Cracking the frame:
With such a large gap, tightening the screws could put too much tension on the flange of the frame causing it to crack as it flexed to meet the roof.
Since we couldn’t buy a roof adapter to solve these problems, we decided to design and 3D print one.
DESIGNING OUR 3D ROOF ADAPTER
There were several stages to design our 3D print and get the dimensions right.
FINDING A 3D PRINTER
First, we needed access to a 3D printer! We looked into buying one but ended up finding a Bambu X2D at our local library.
GETTING THE DIMENSIONS RIGHT
To get a flush fit, we mainly used a measuring tape and combination square to measure the height (~7mm) and width (~30mm at the top, 45mm at the bottom) of the ribs on the roof.
Then we dusted off our protractor from school to measure the angle of the ribs (~40 degrees).
We then subtracted this from the width of our Maxxair Maxxfan Plus to get a rough sketch that we could mock up in the design software.
SOFTWARE TO DESIGN THE PRINT
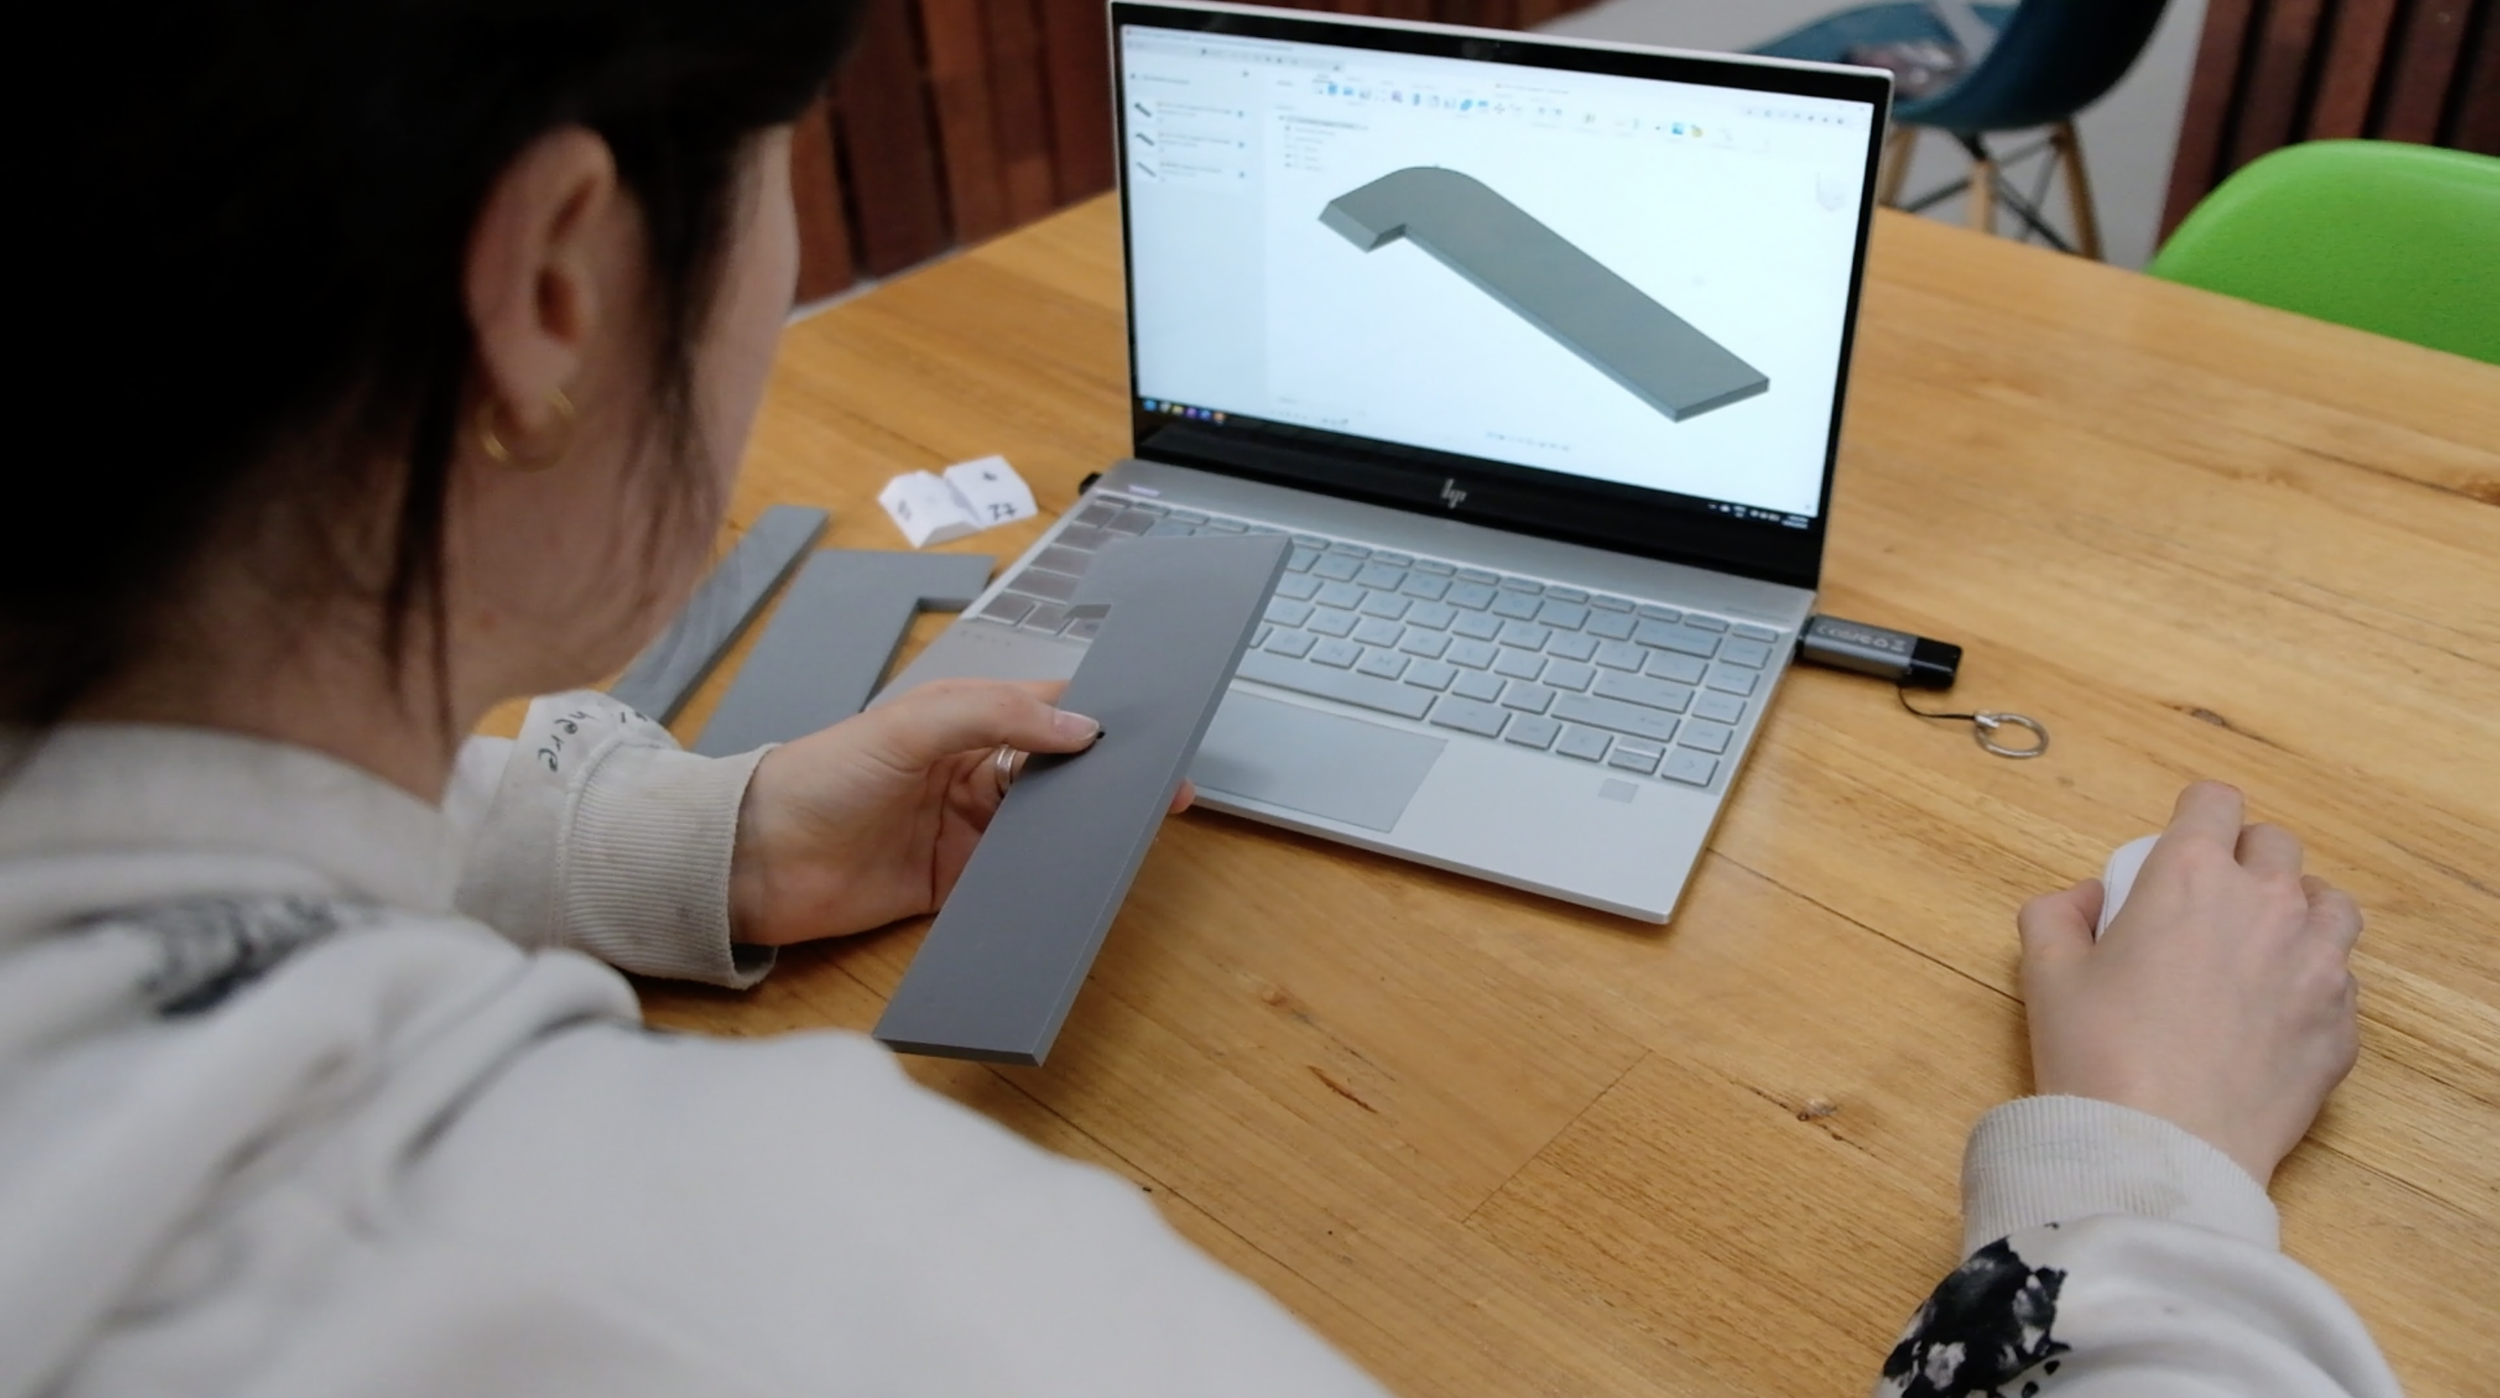
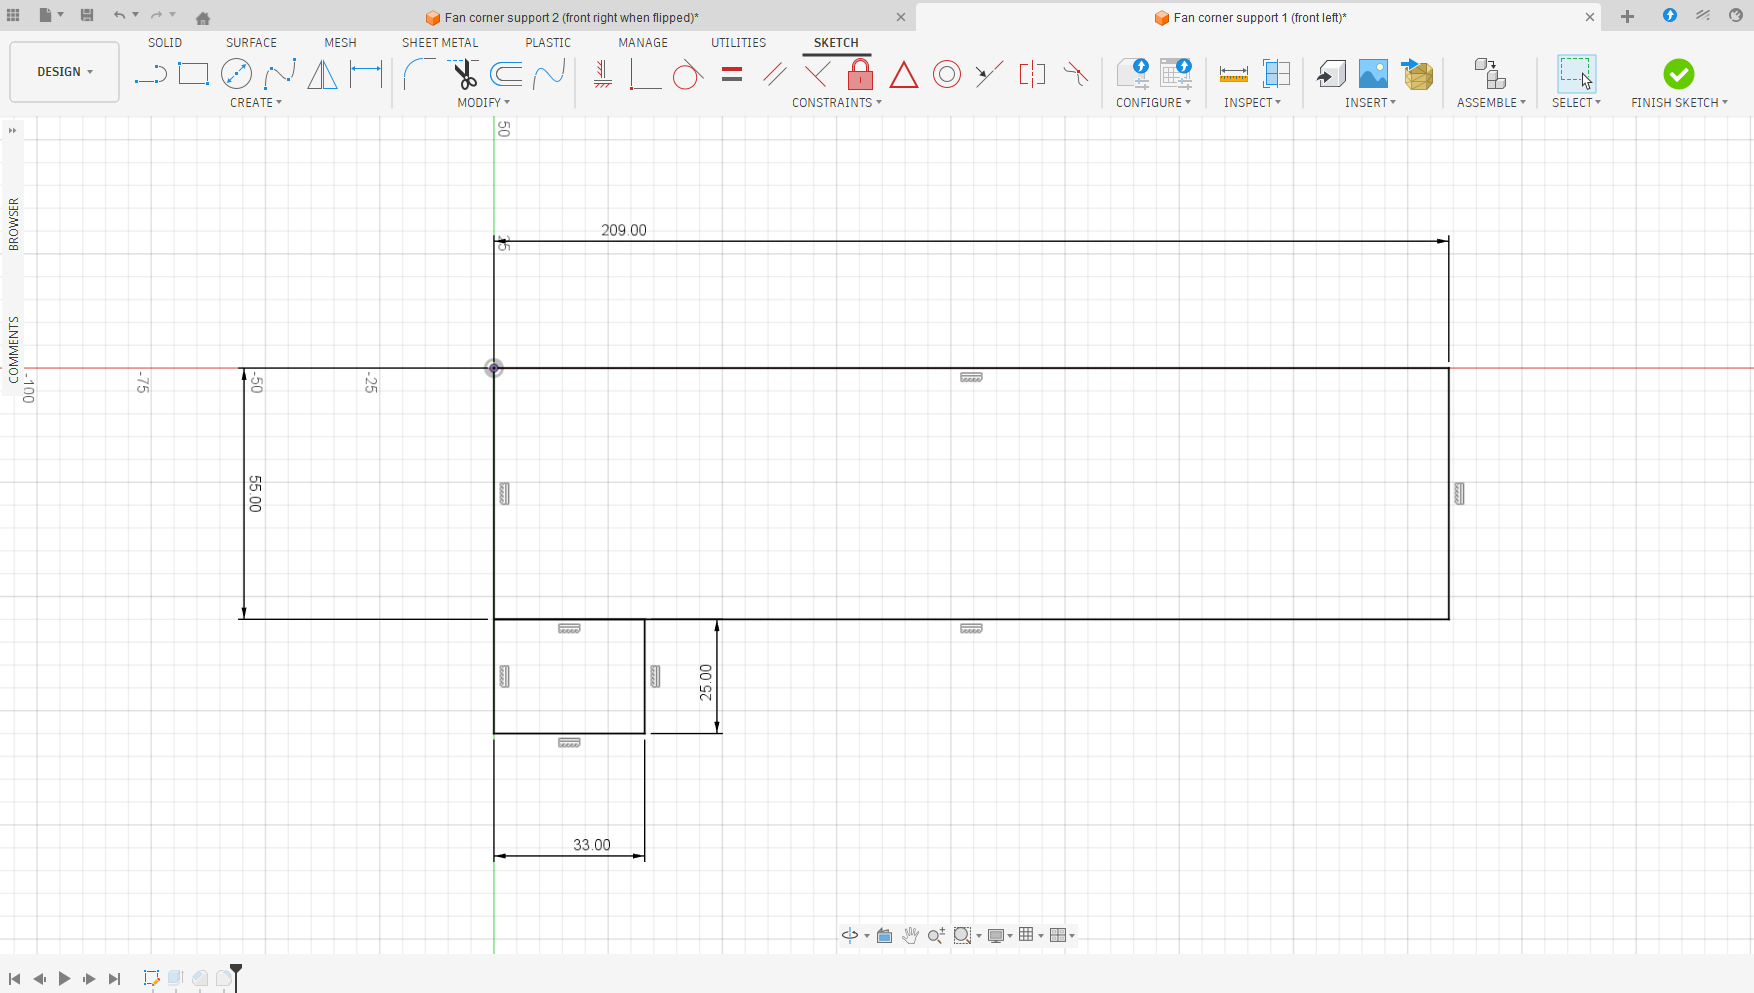
We tried a few free online software programs (including Tinkercad and Sketchup) but we ended up using Autodesk Fusion.
It was the most accurate and fairly user friendly so we could quickly get a prototype.
PROTOTYPES
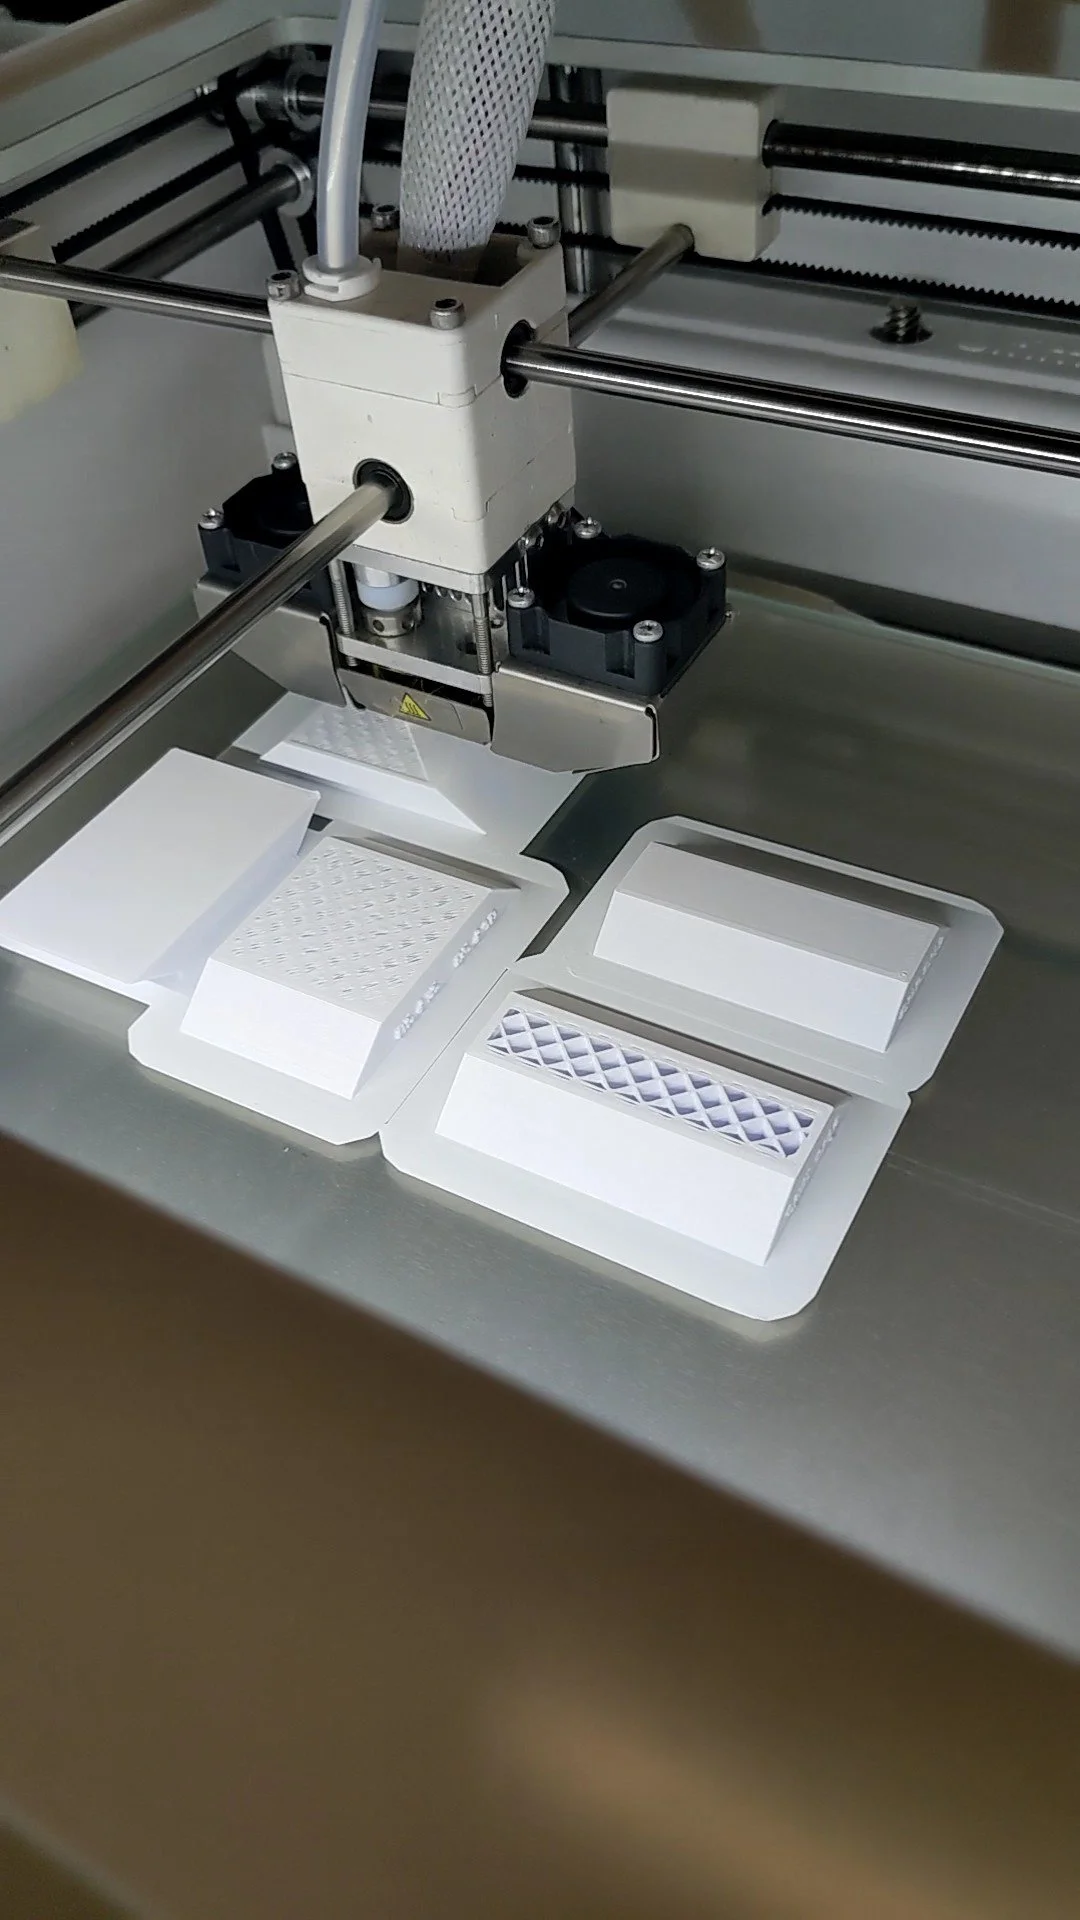
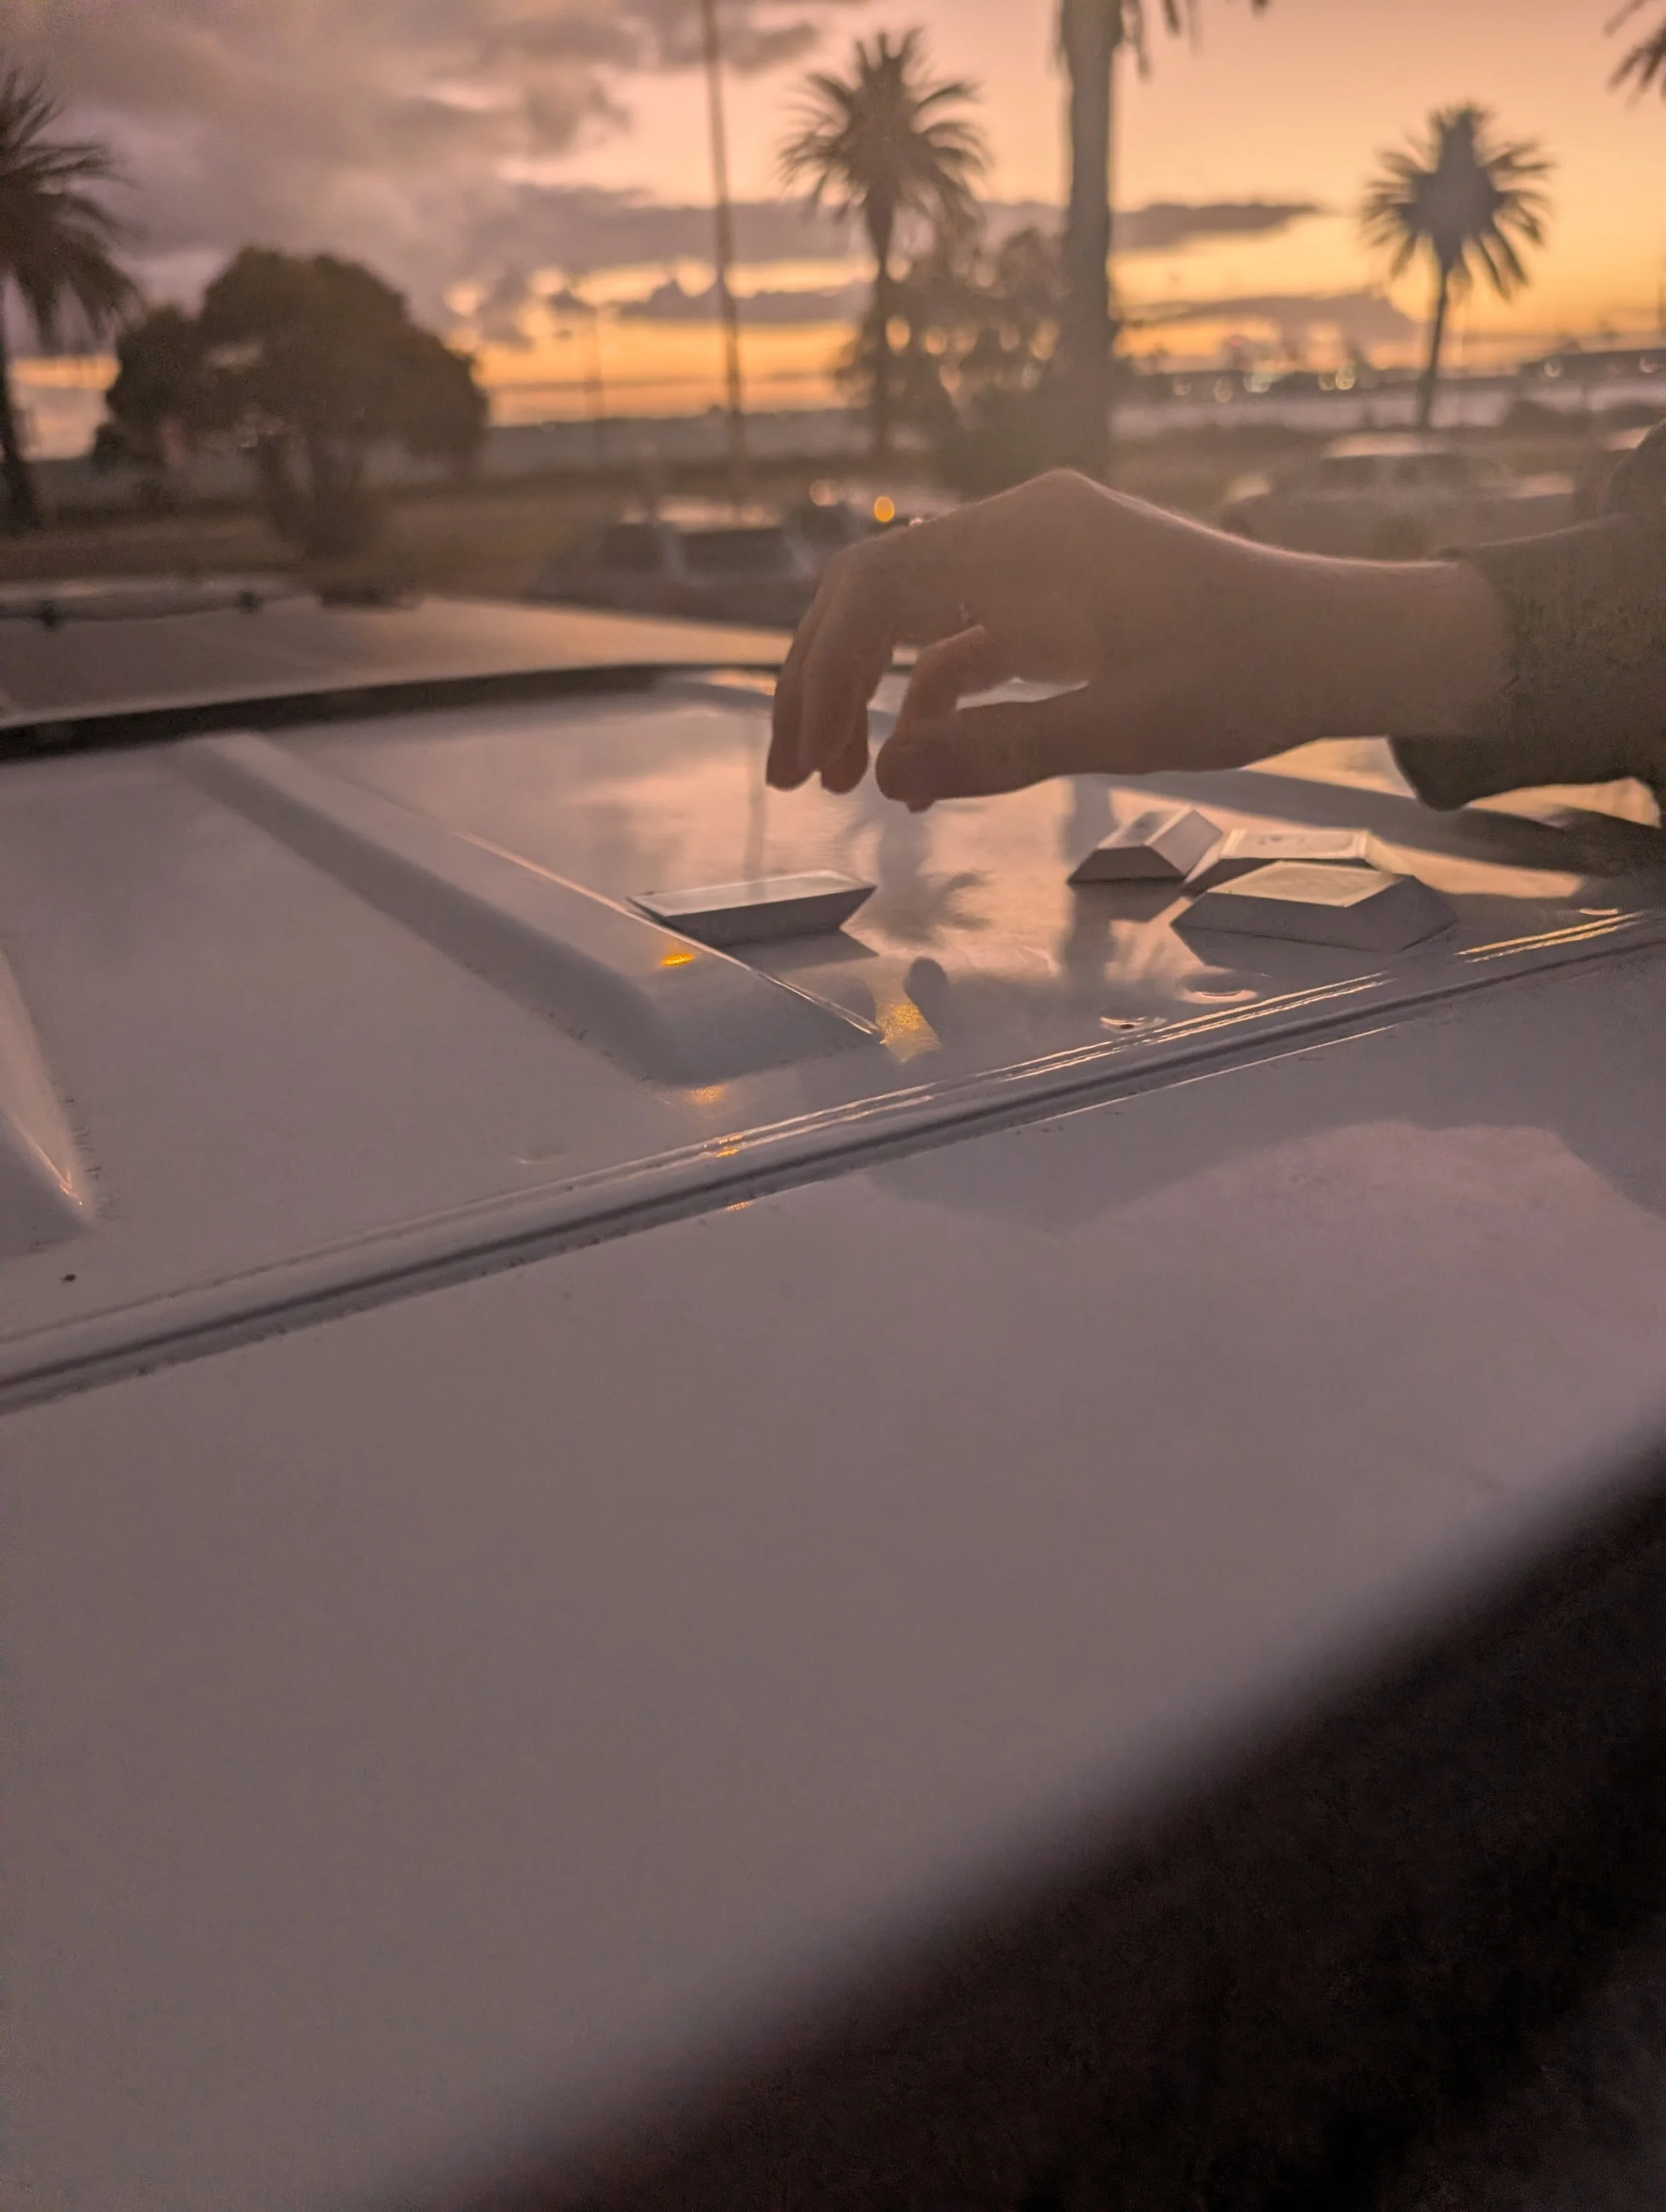
We 3D printed a handful of small prototypes at slightly different heights and angles to get the most accurate fit.
We also tested the prototypes for compression strength and general wear to make sure the 3D print would hold up in the van!
LIMITATIONS
The library 3D printer was small and our prints were limited to 2 hours so we couldn’t print one continuous adapter.
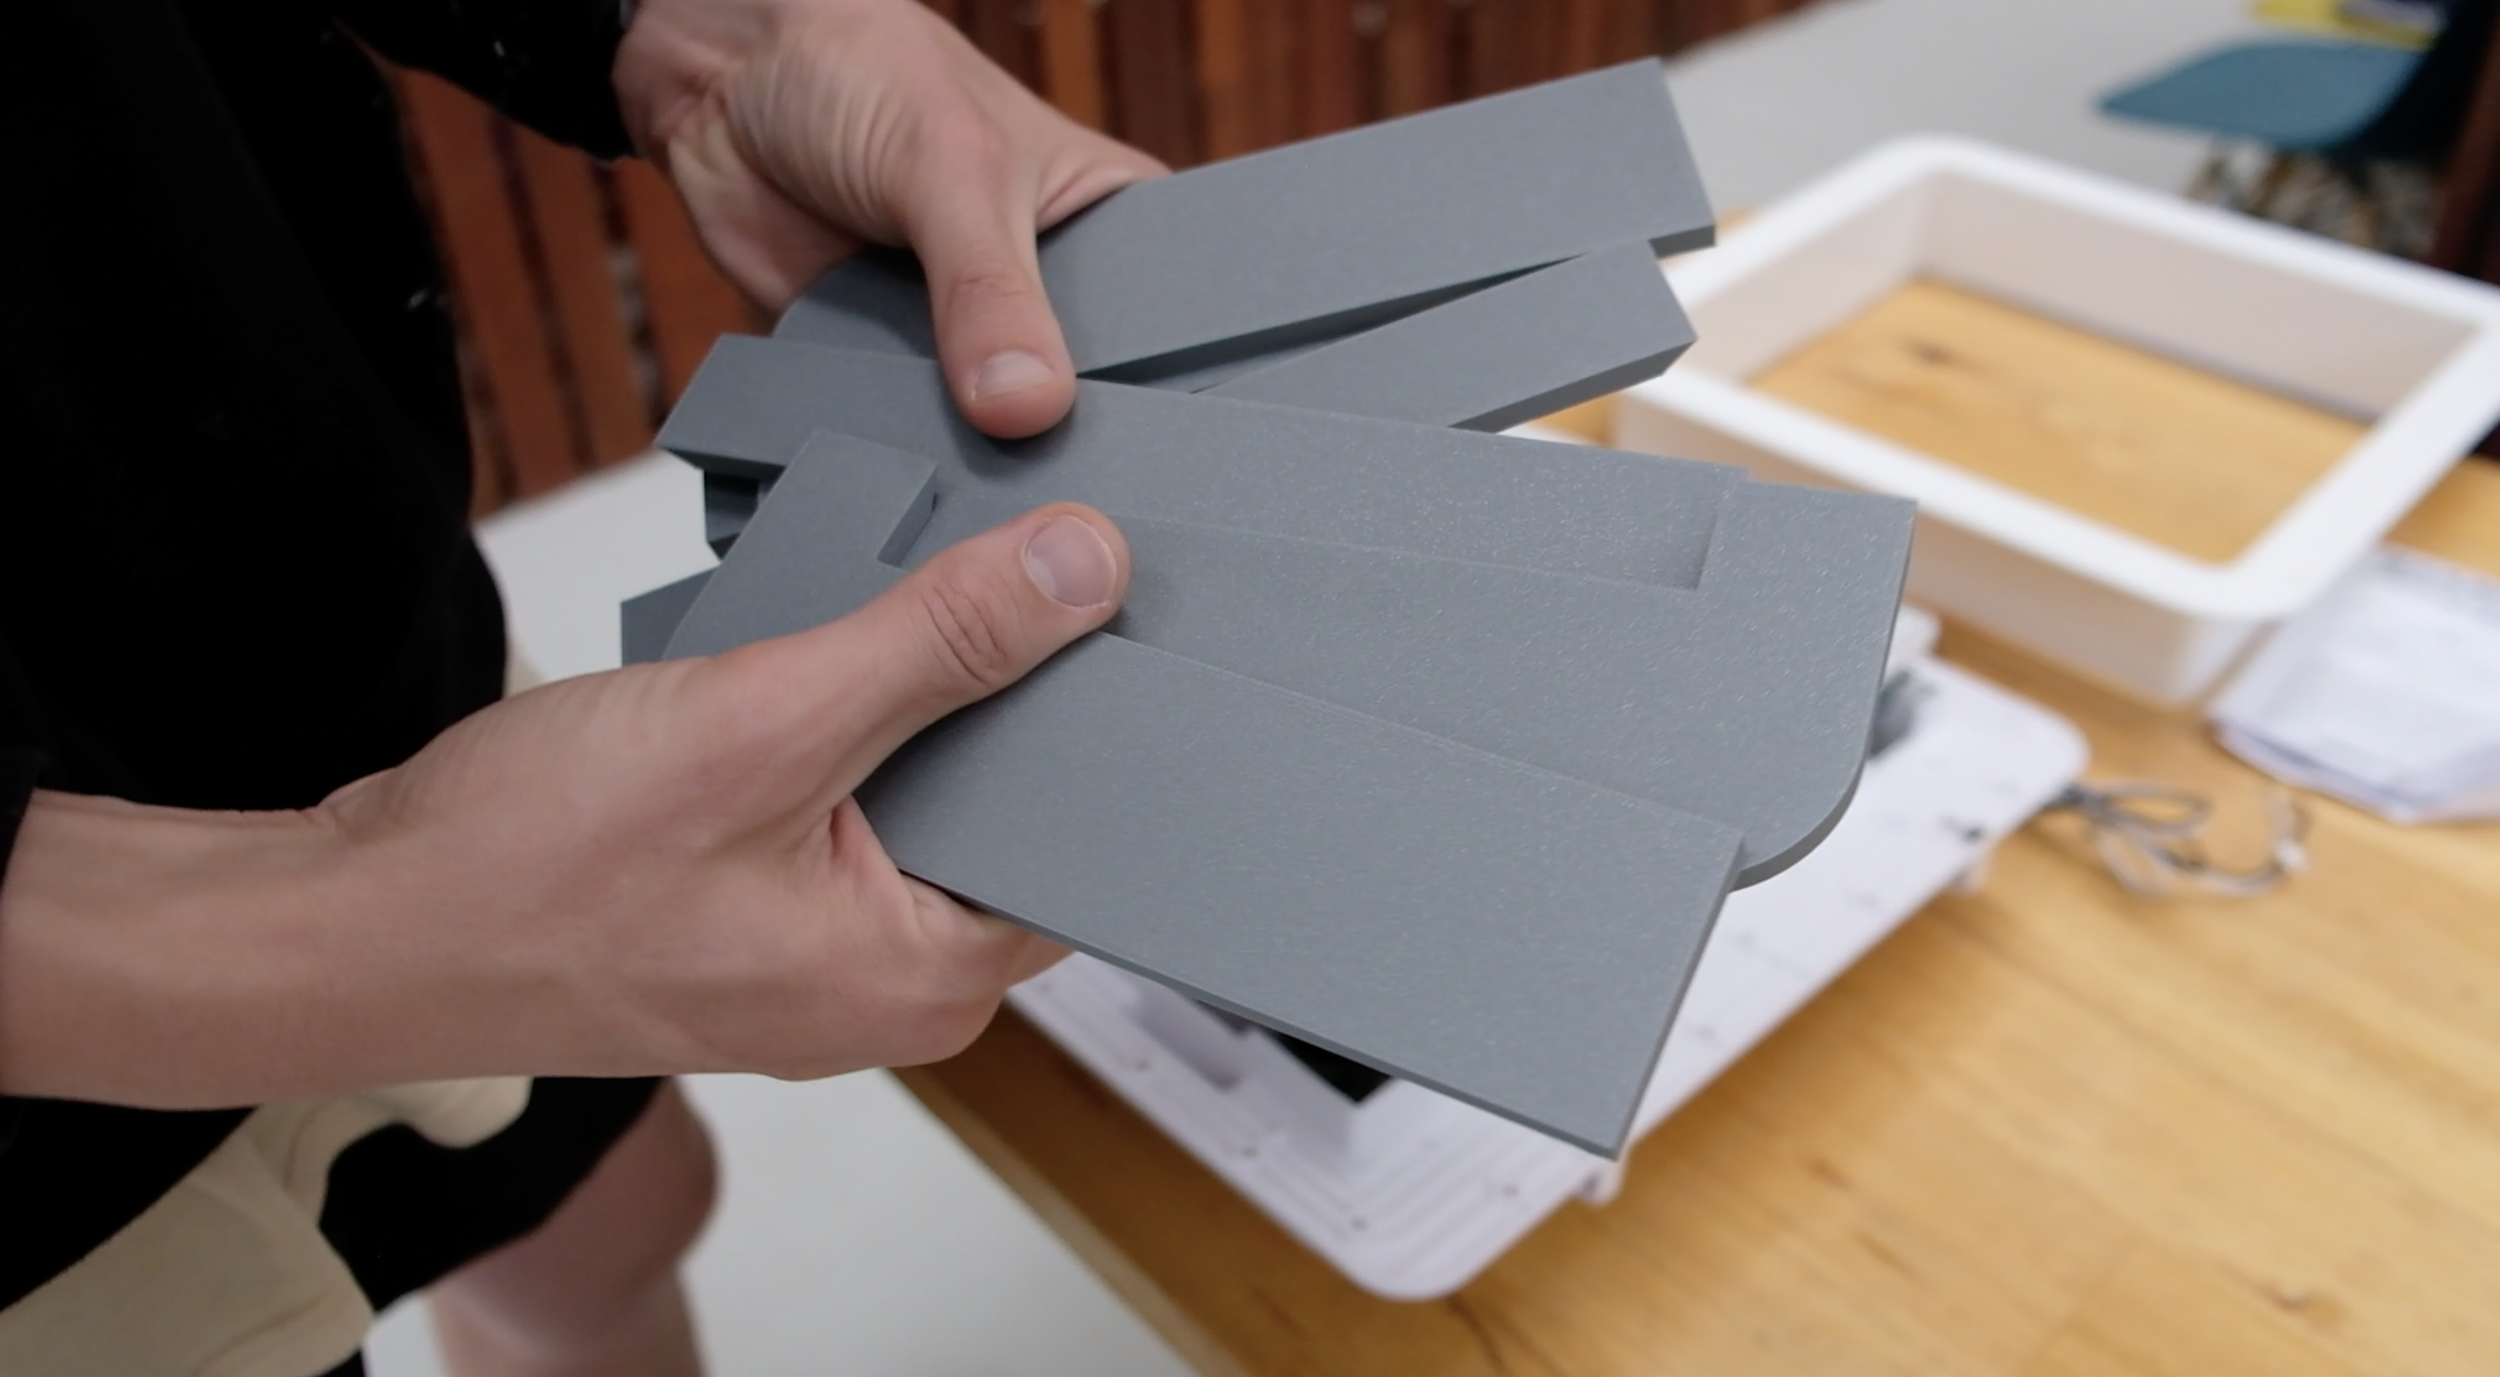
Instead, we printed six parts that we could position strategically, giving us more flexibility in the placement.
PRINTING OUR 3D ROOF ADAPTER
Once the prototypes were complete, we were ready to print.
FILAMENT TYPE
The library only uses standard PLA filament, but it seemed sturdy enough as ideally it will never be in contact with the sun or water!
PRINT SETTINGS
Altering the print settings changes the infill, strength, and print time.
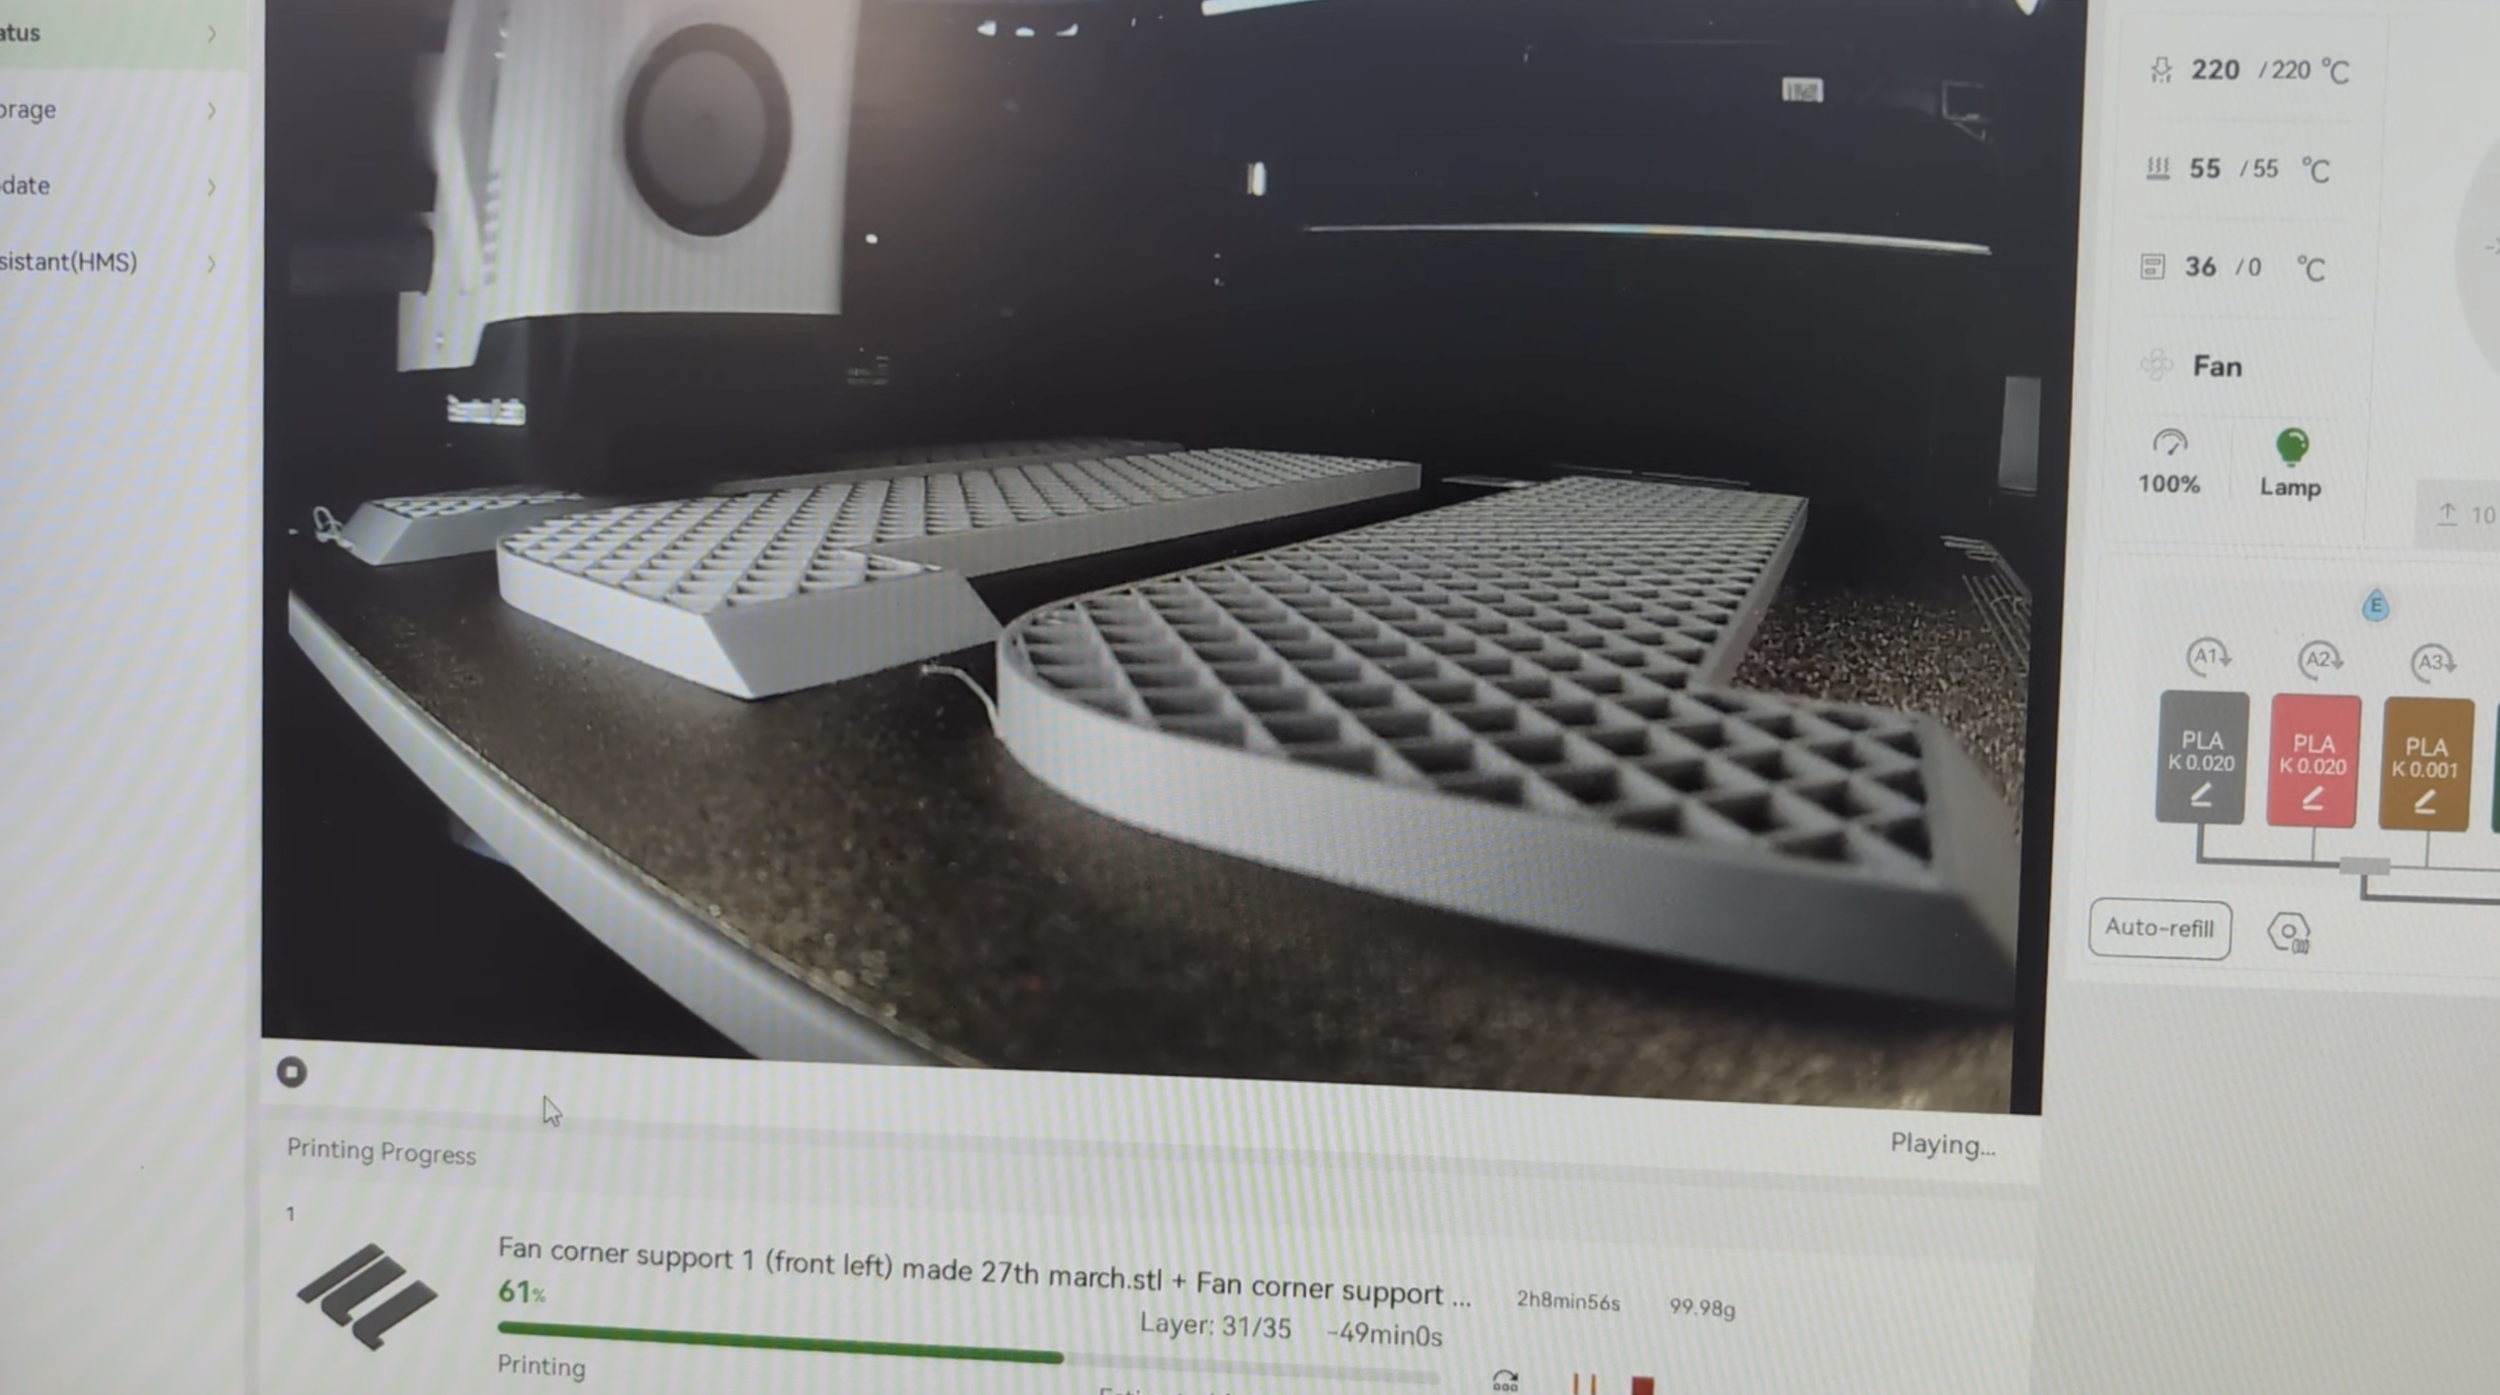
We used an STL file with normal print quality.
This balanced getting a smooth finish, printing multiple parts at a time, and gaining the maximum strength within the library’s time limit.
COLOUR
We printed our adapter in grey, as that was the only neutral colour available at the library (unless we wanted hot pink).
This was helpful as it contrasted clearly against our white roof during installation.
PRINTING
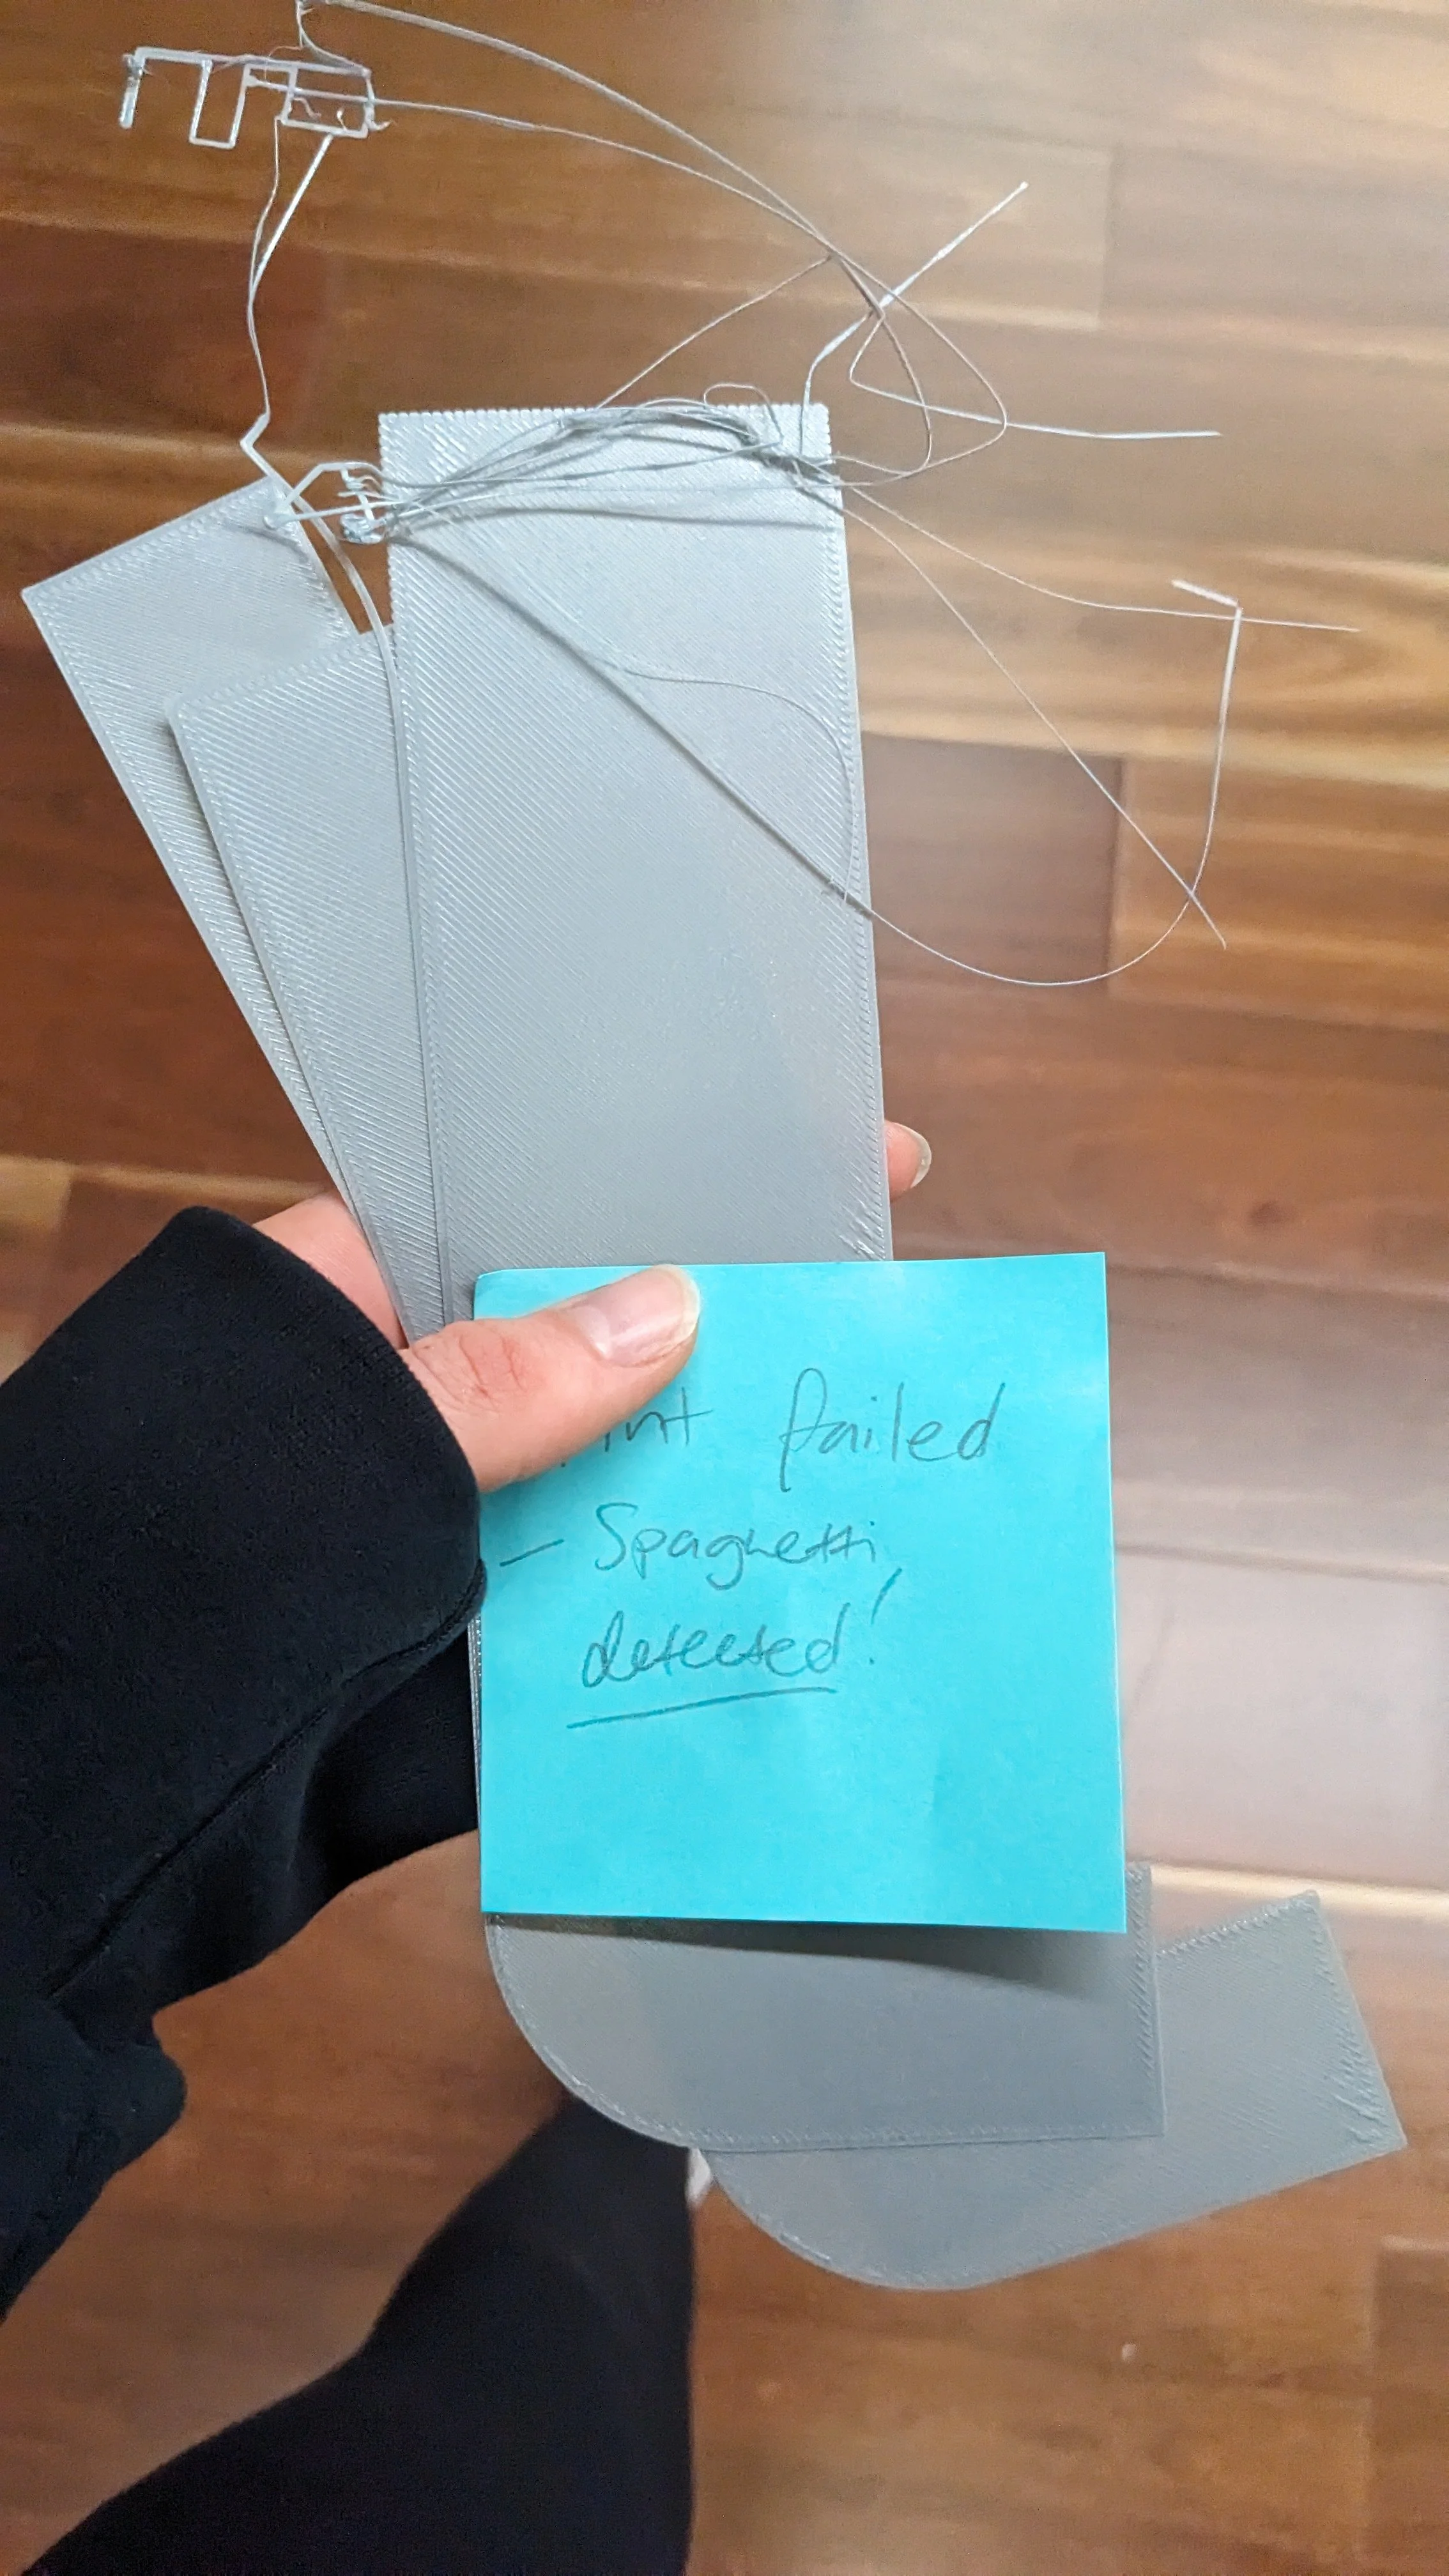
As you can imagine, there were a few failures before we got the finished product.
We made three designs - one for the left corner, right corner, and the straight in between.
We printed each part twice for a total of six parts.
It took us four days to print all six parts successfully because of the limitations mentioned.
All the effort was worthwhile when we had it ready to go for installation.
INSTALLING OUR 3D ROOF ADAPTER
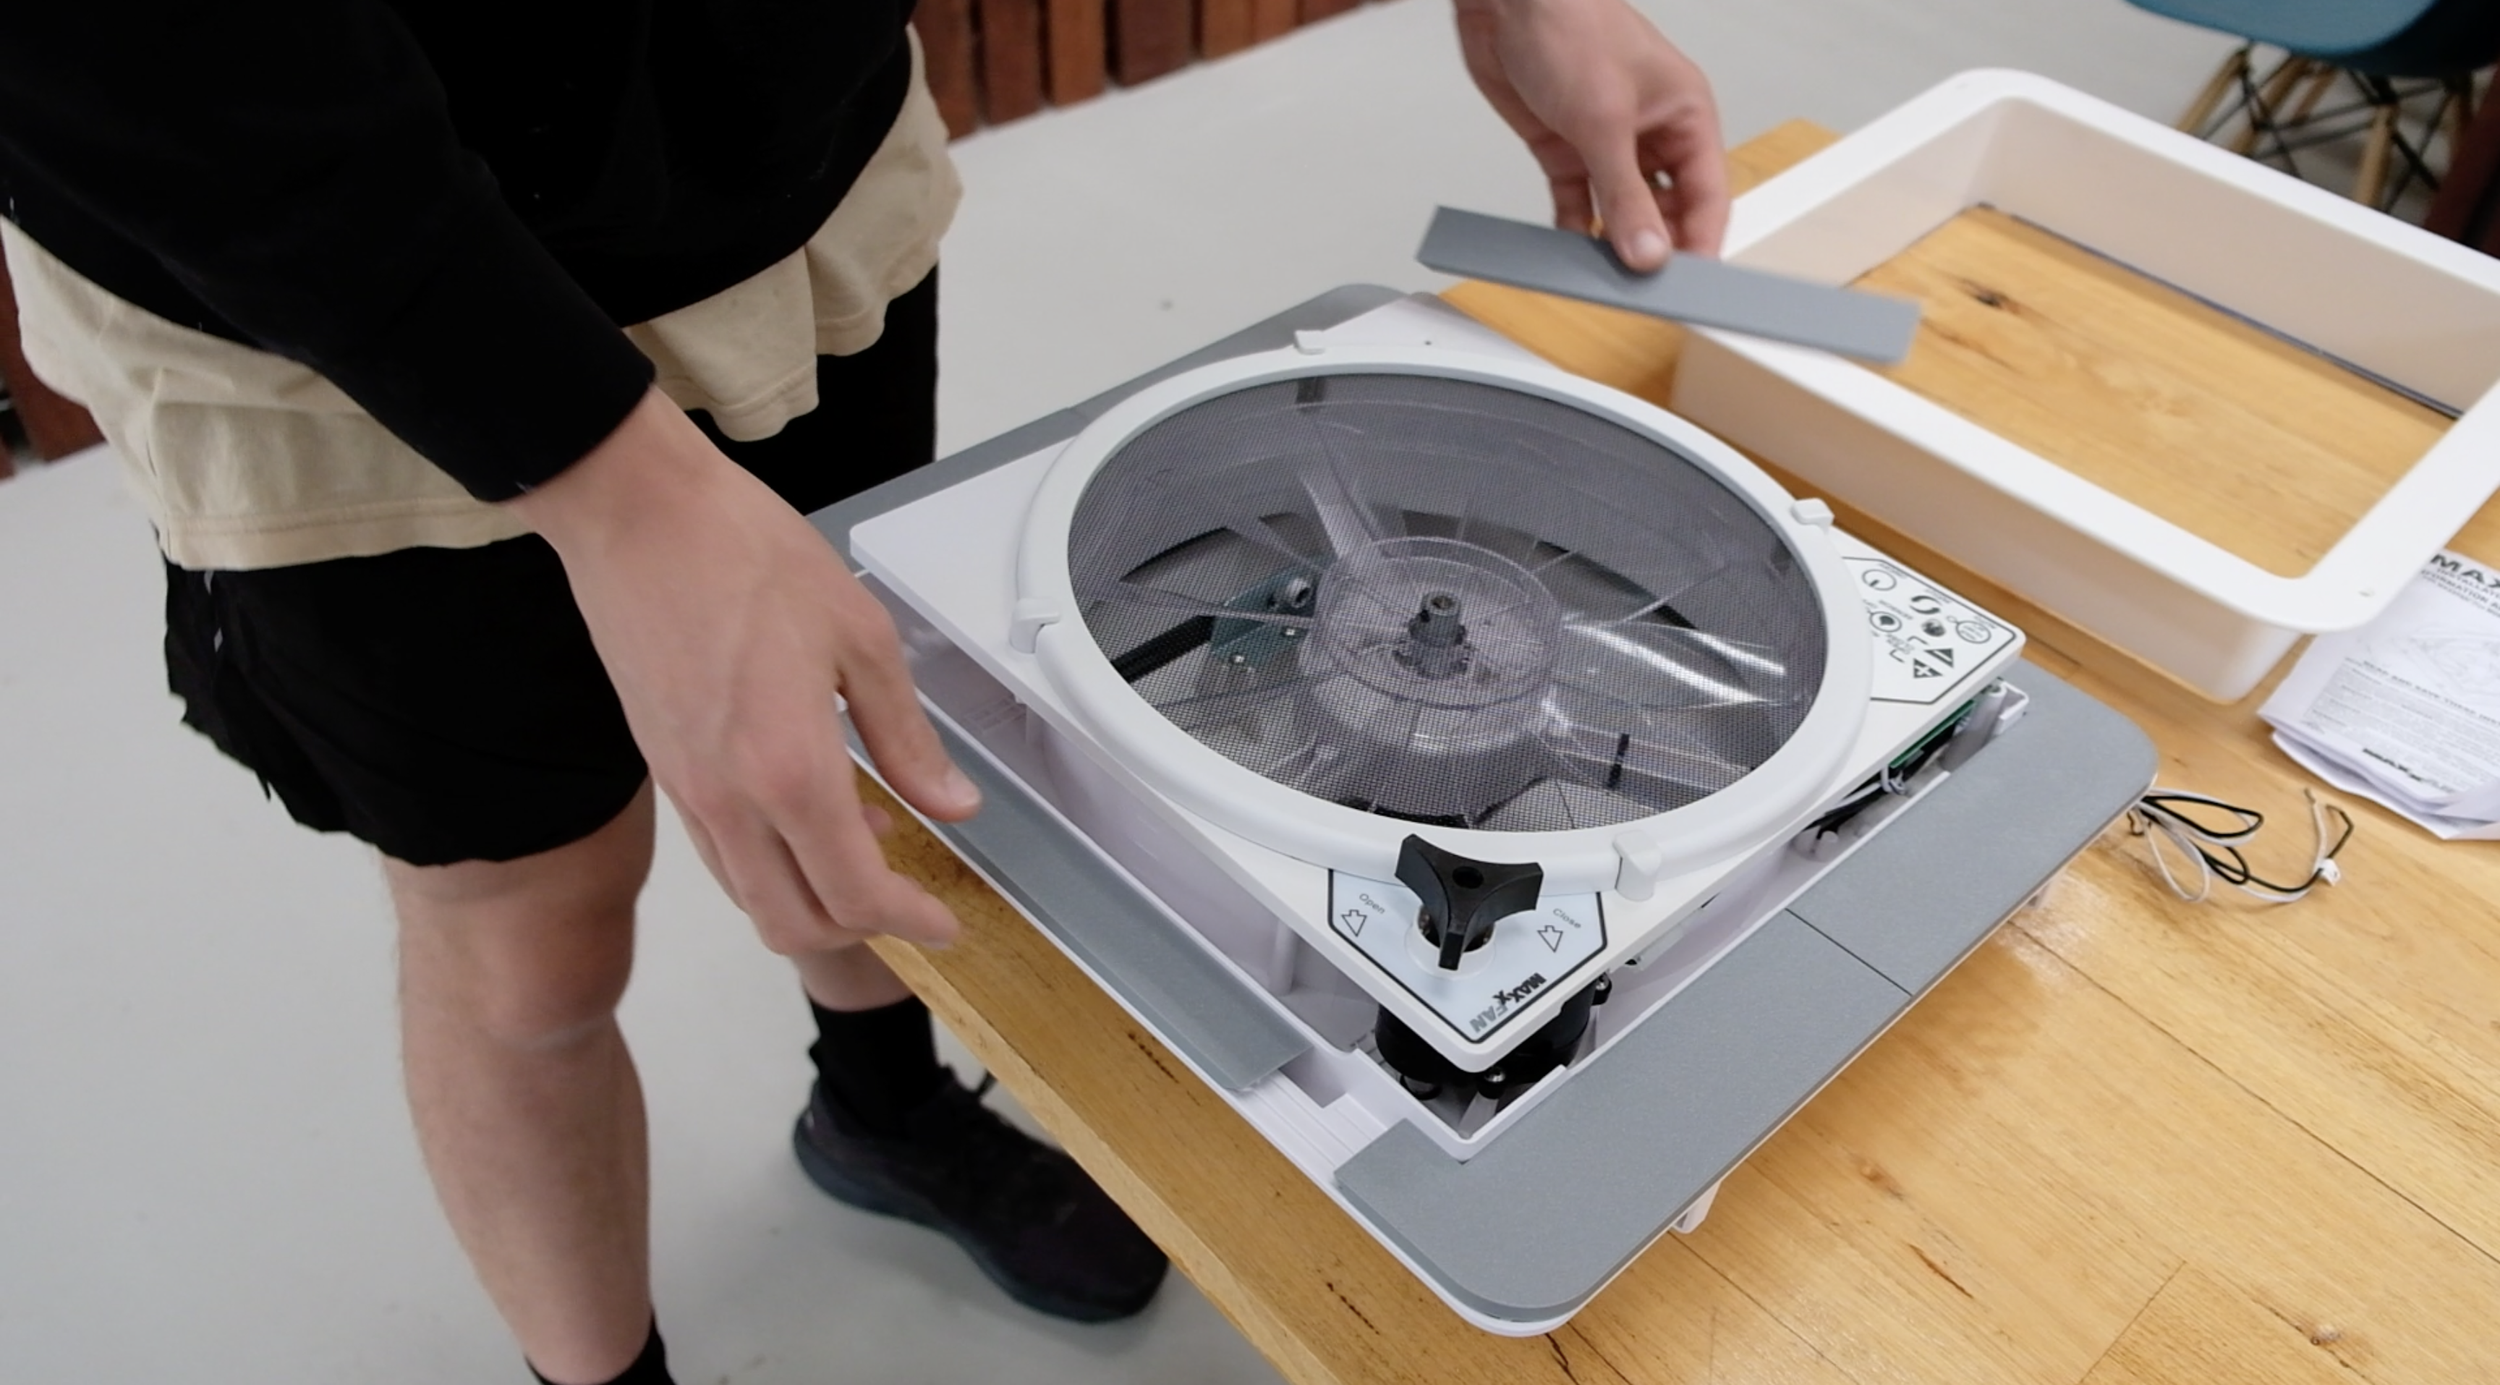
The following focuses on our custom roof adapter during the fan installation.
For the full step by step, check out our Maxxair fan installation.
PREPARATION
Cleaned the van roof thoroughly with isopropyl alcohol
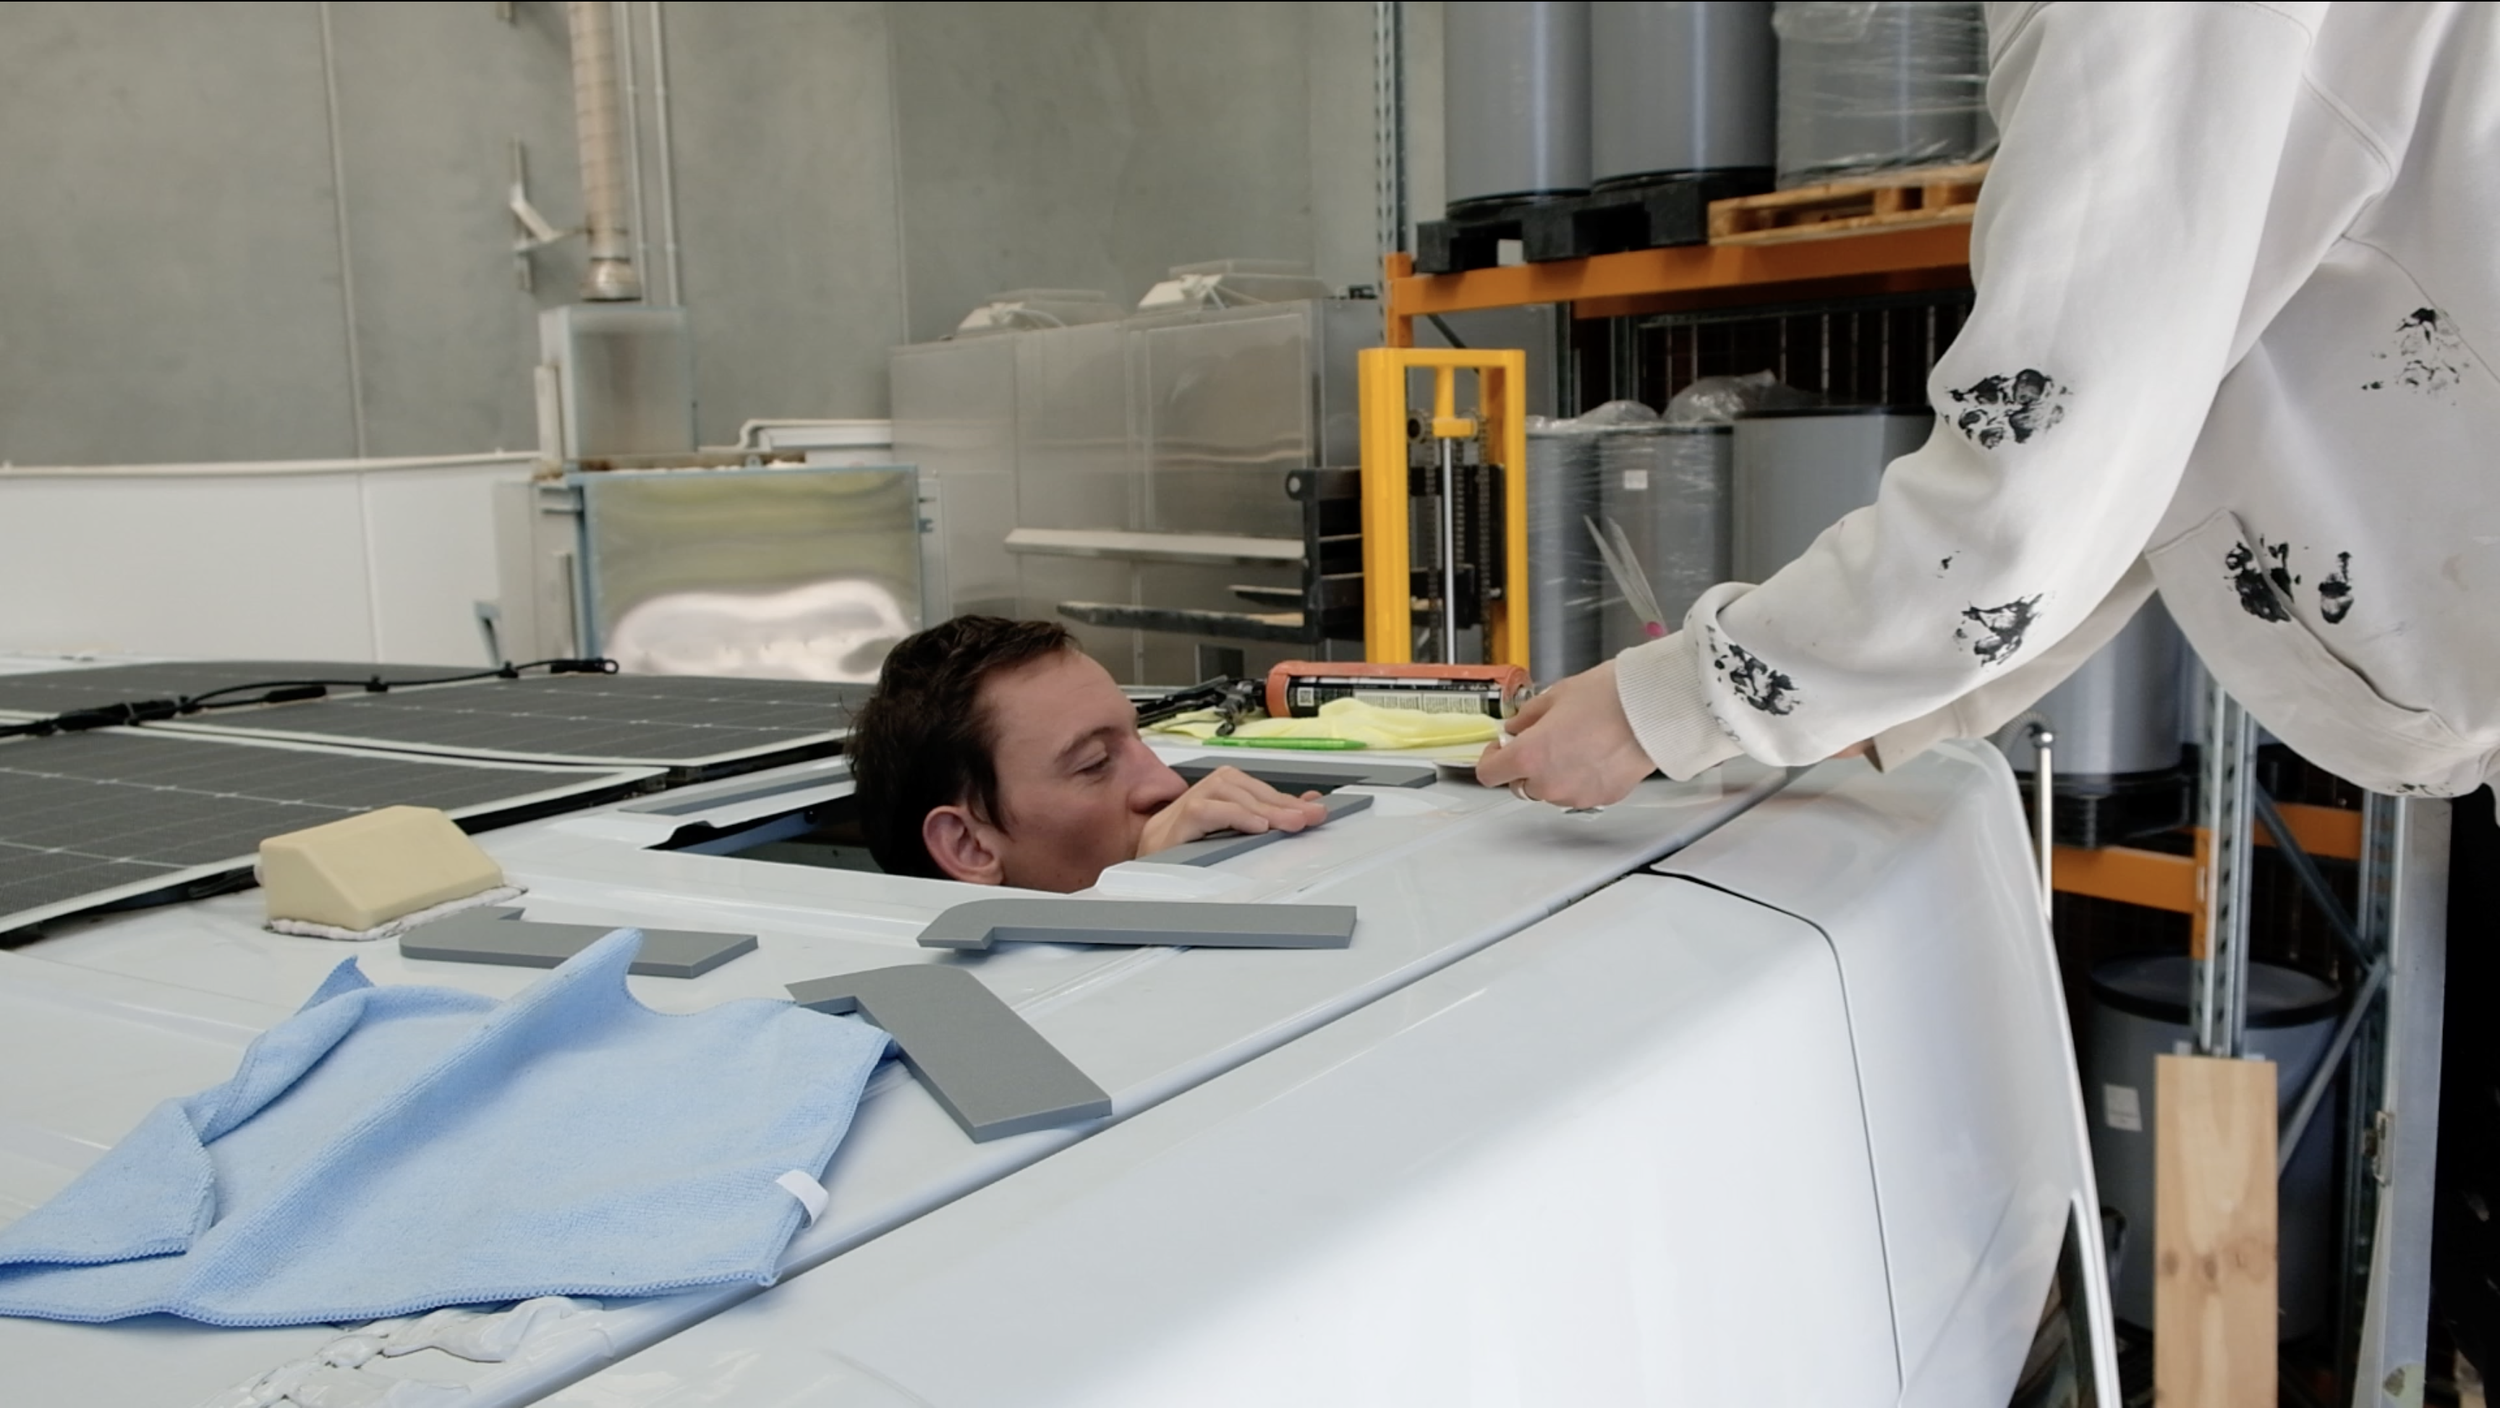
Once the hole for the fan was cut, dry fit the 3D parts to make sure they fit well
ATTACHING THE ADAPTER
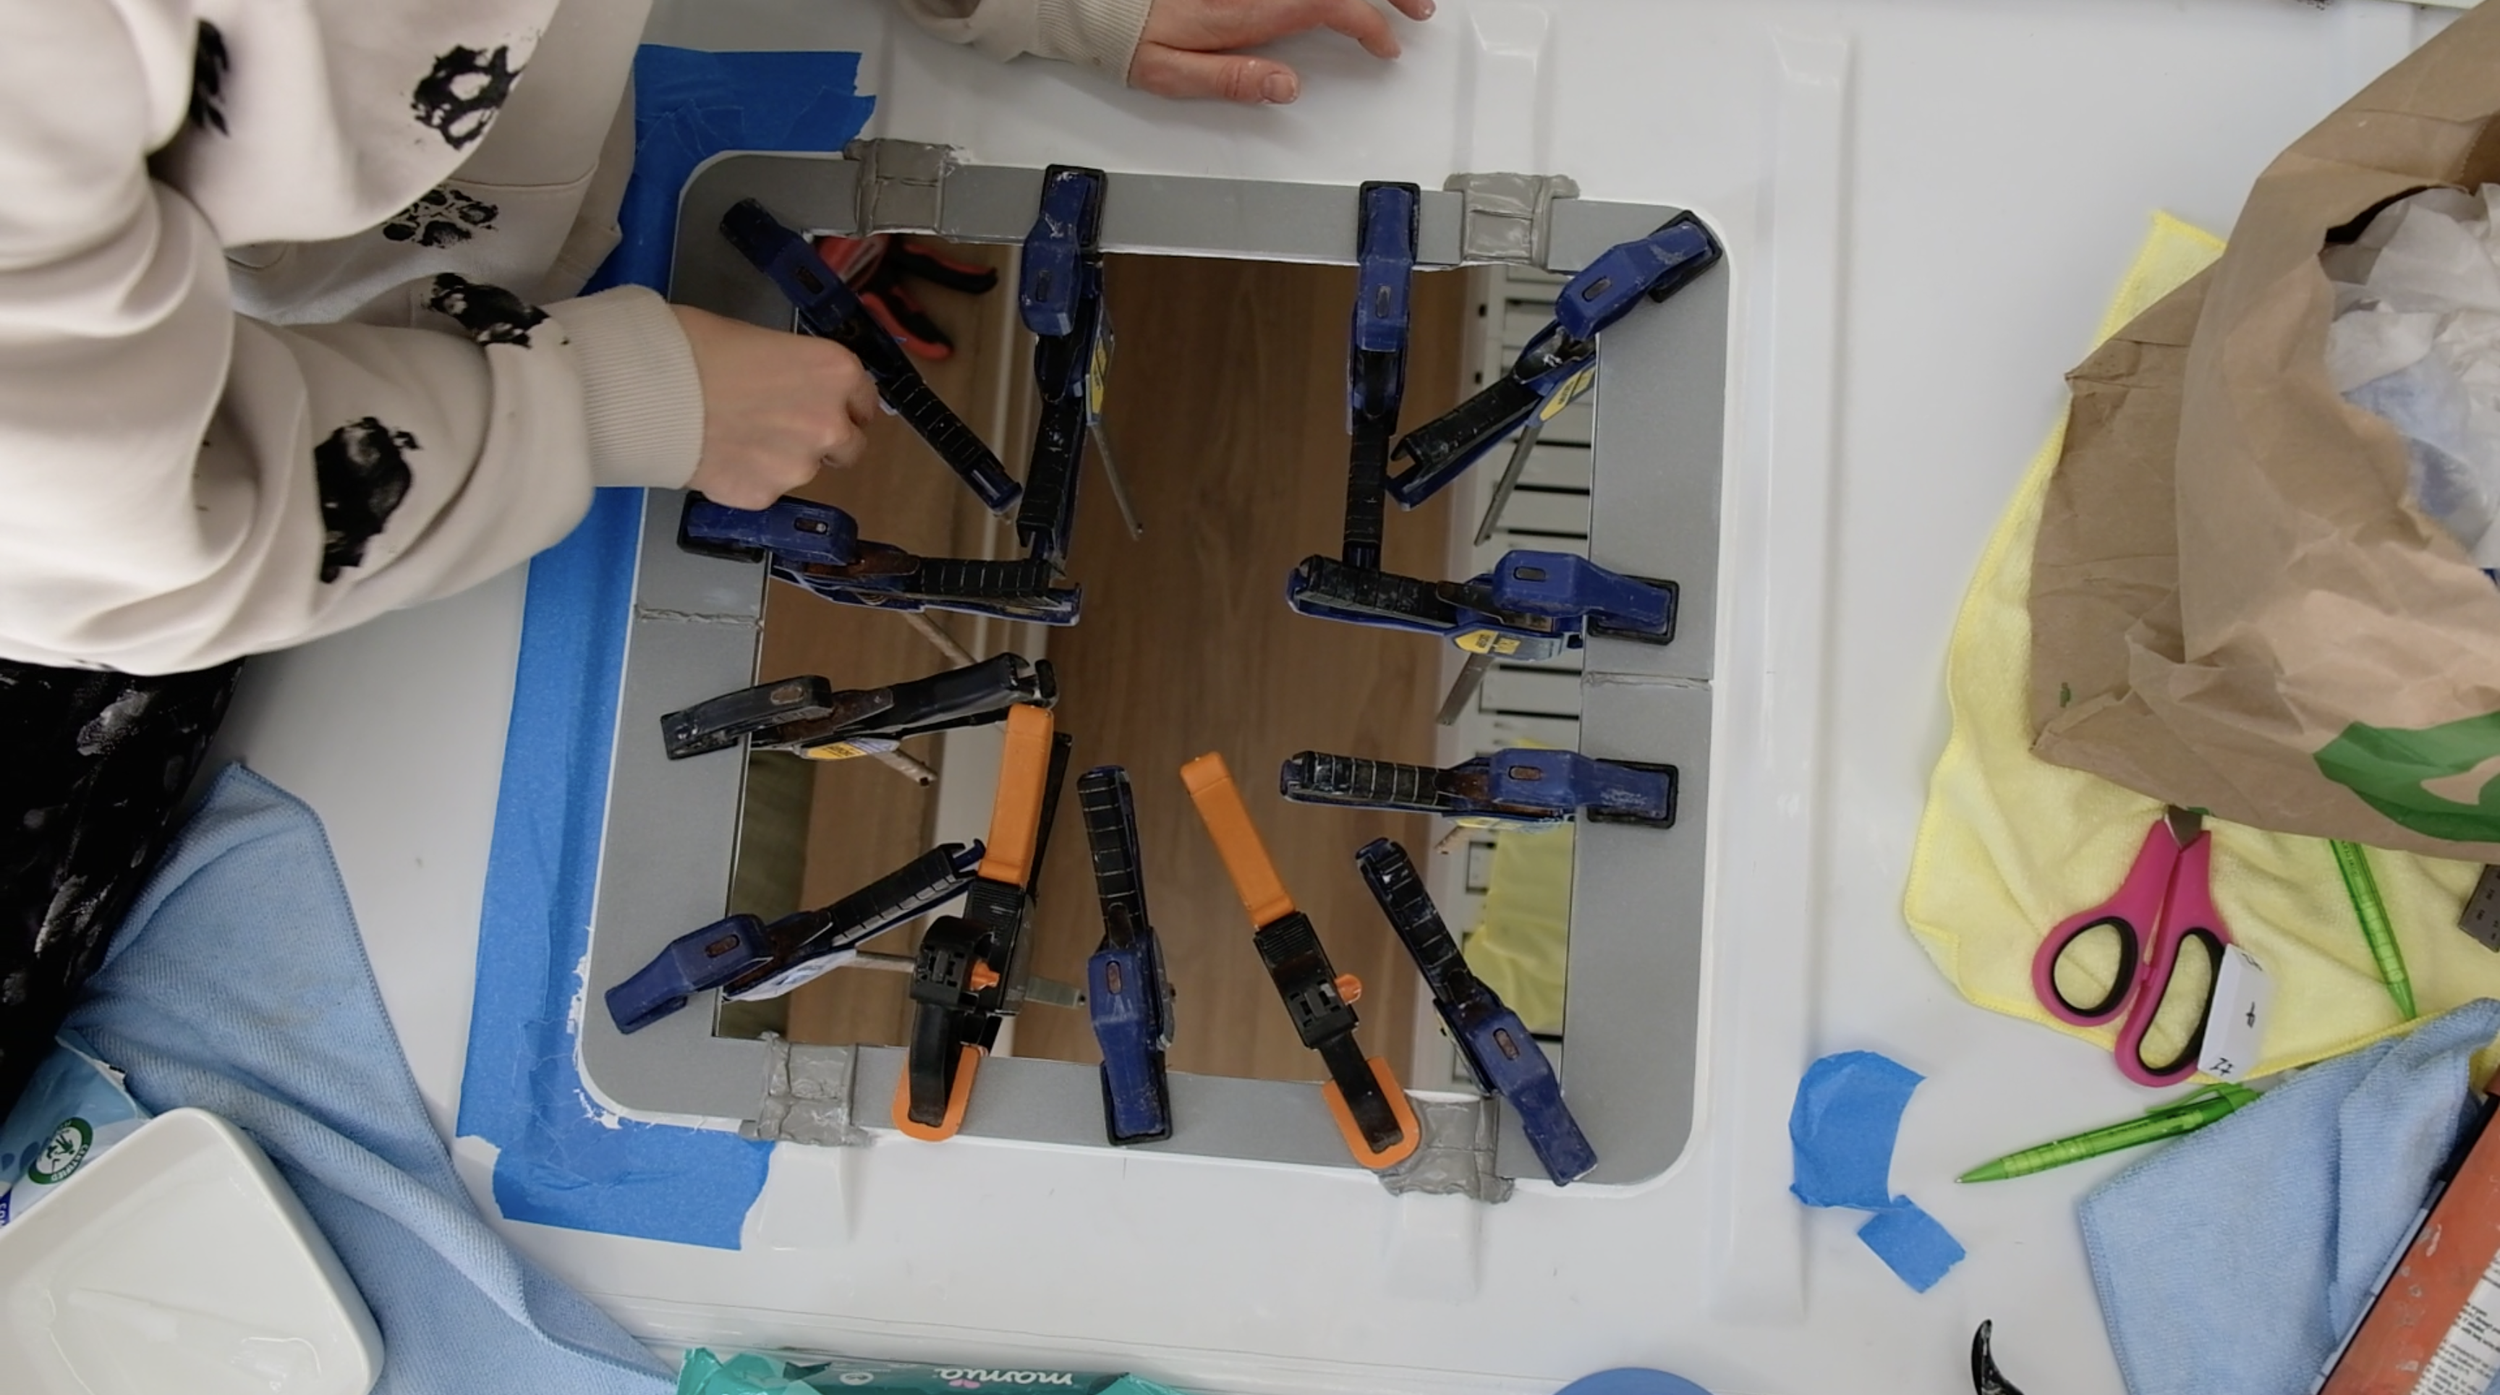
Glued the 3D print adapter to the roof with Sikaflex 221, carefully positioning them in the right spot
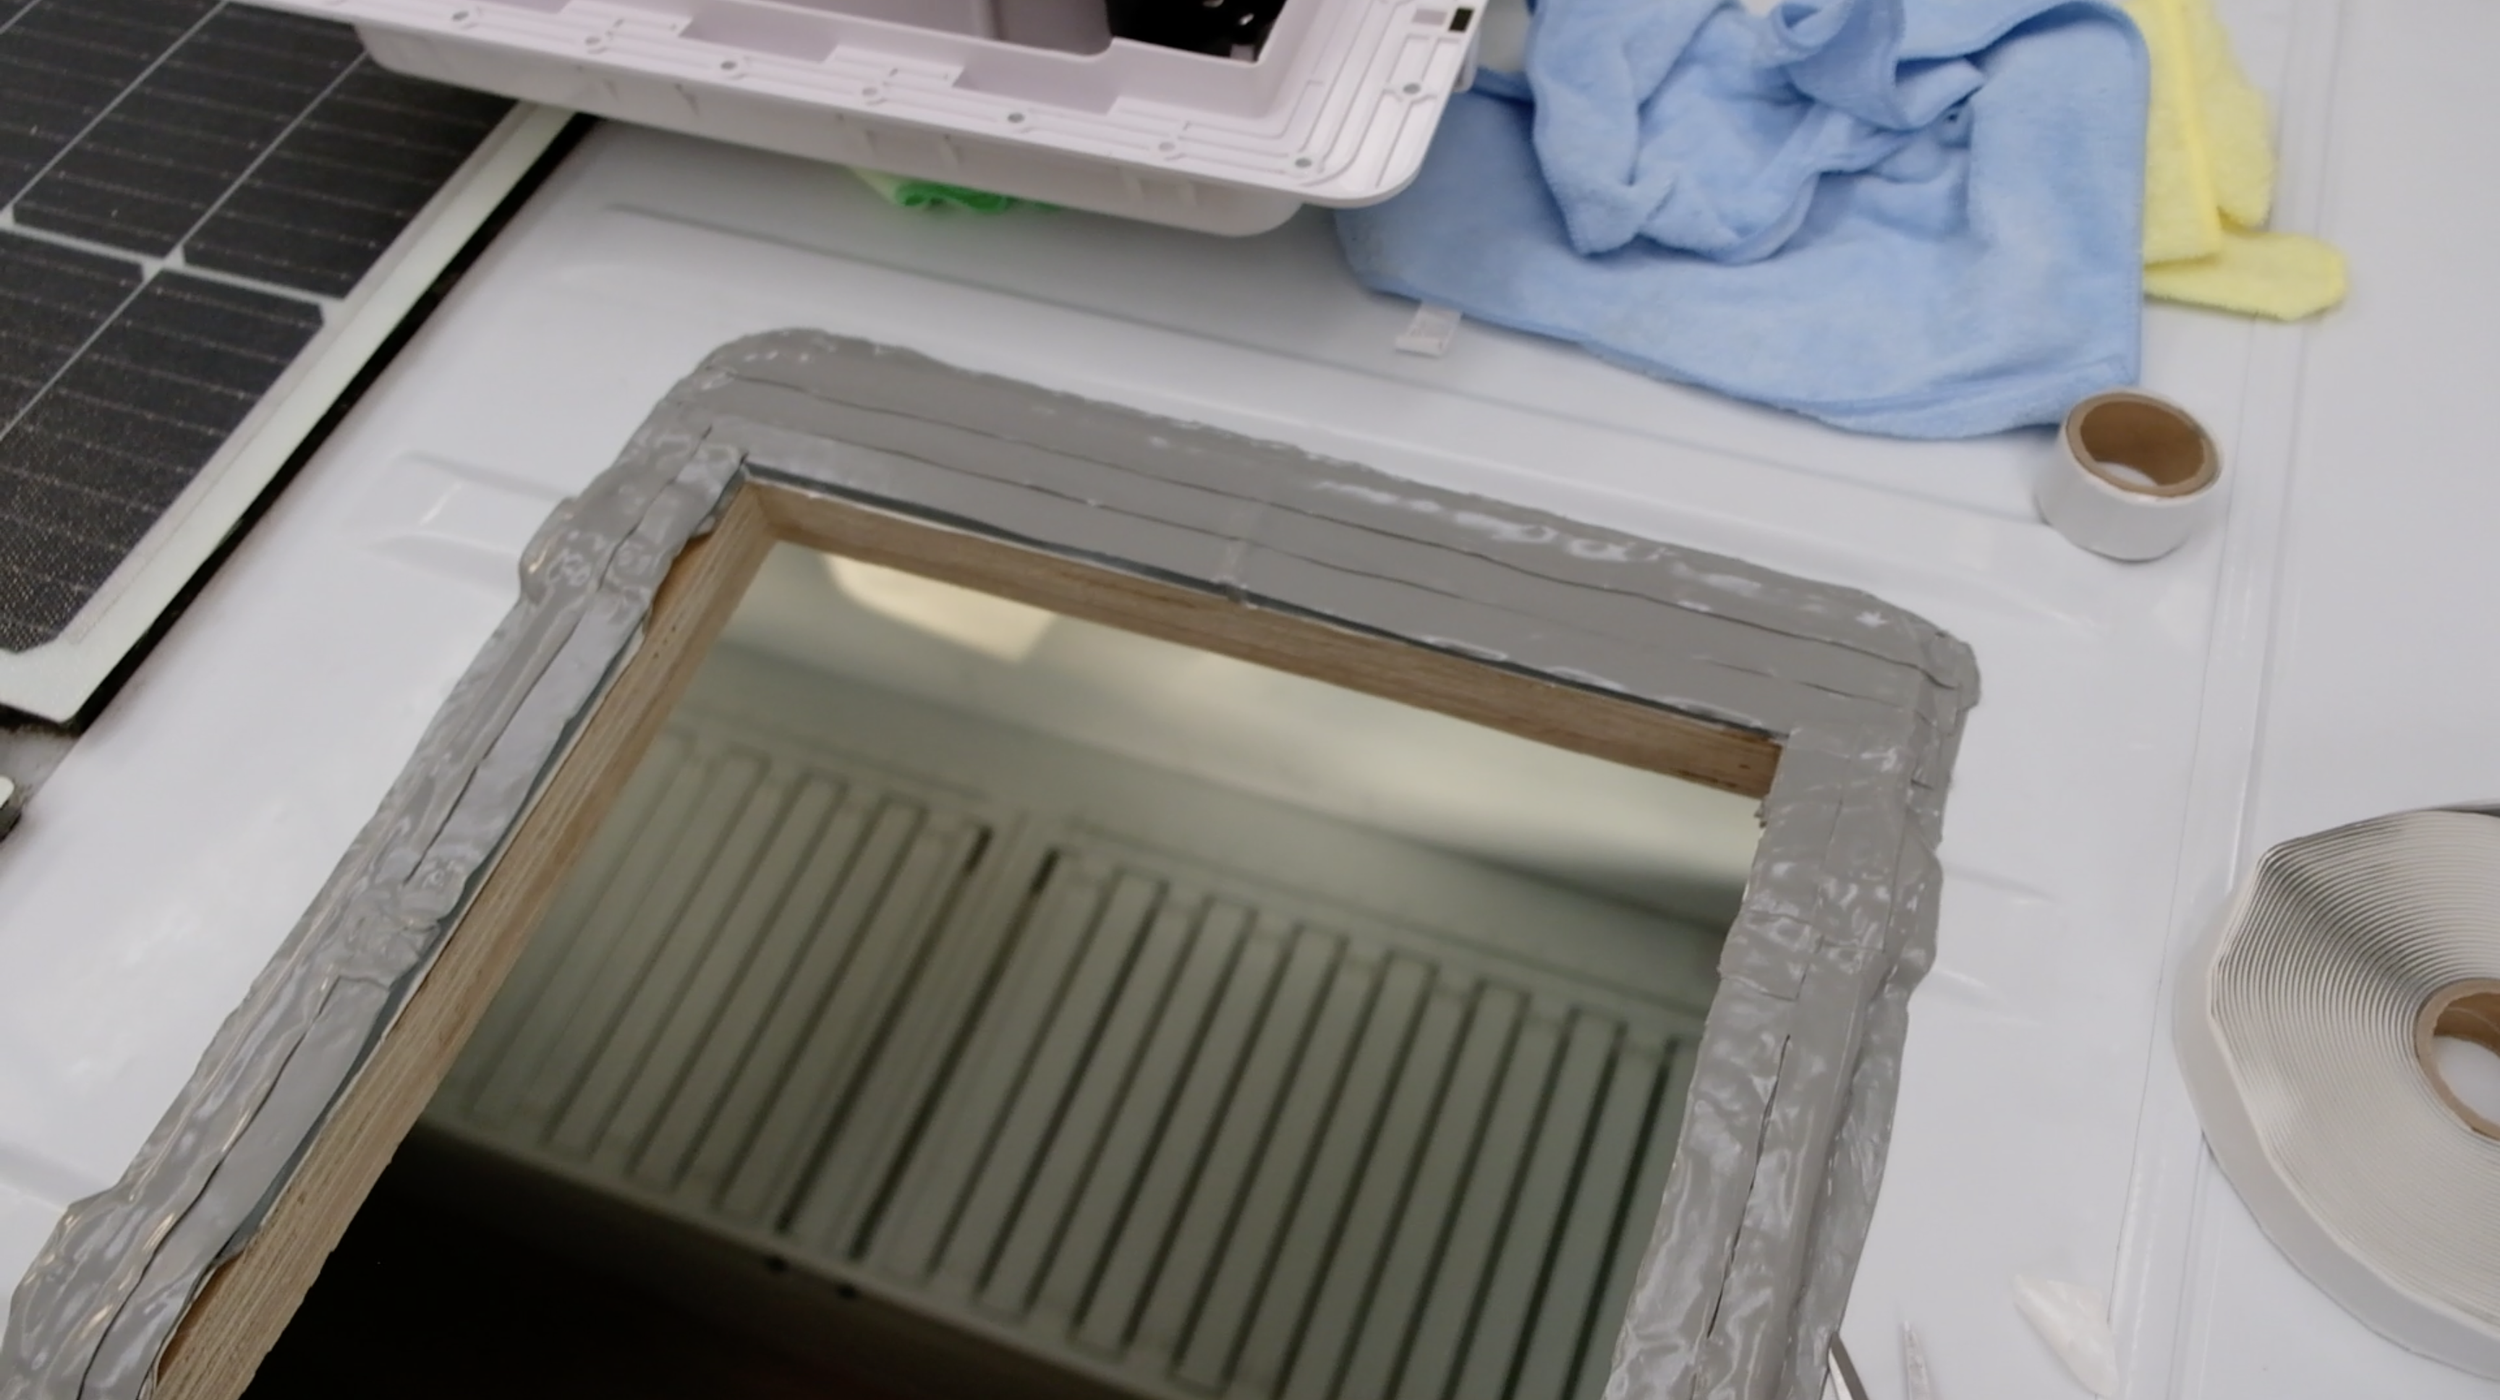
Added butyl tape between each 3D part to join the seams and create a seal
DRILLING + RUST PROTECTION
Once it was dry (overnight), drilled a 4.8mm pilot hole through the fan and adapter
Applied rust protection to cover any exposed metal and prevent corrosion
WATERPROOFING
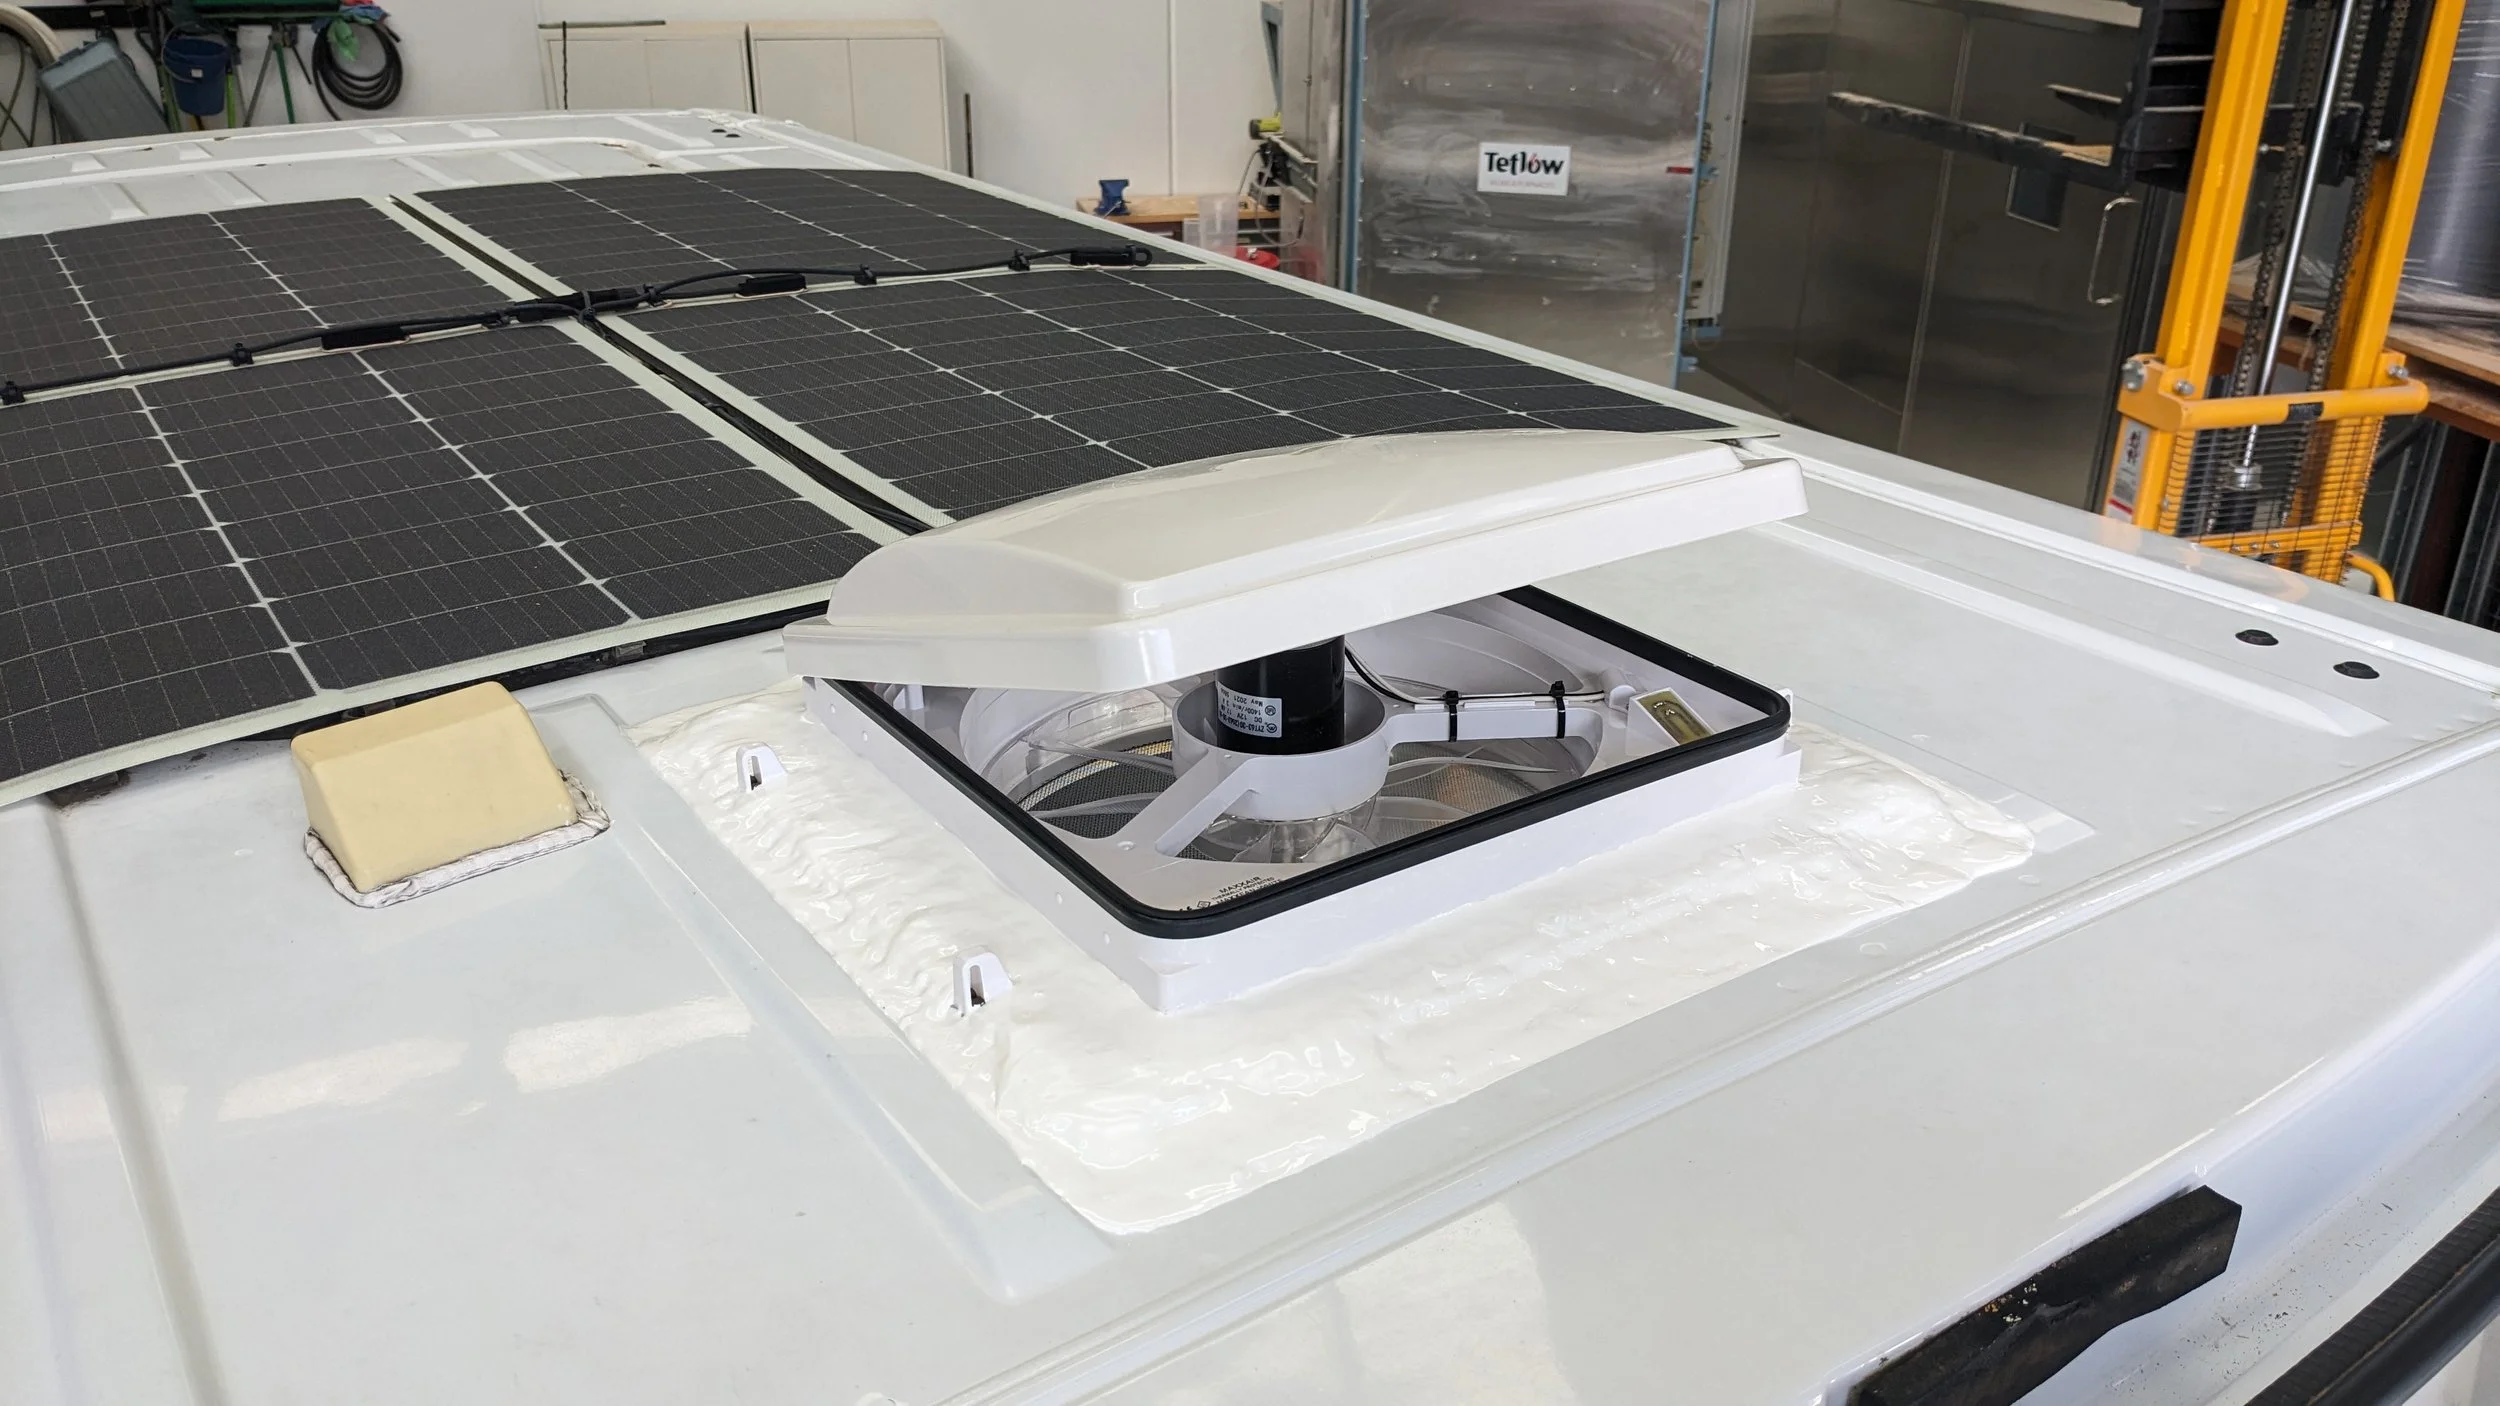
Added several layers of butyl tape as the inner layer of waterproofing and to seal the fan onto the roof
Once the fan was installed, added a layer of lap sealant as the final waterproofing step
TRY 3D Printing FOR YOURSELF
Learning to print a custom 3D part is so cool!
The options for 3D printing are unlimited, and it’s easier than you might think!
It made our fan installation so much smoother and we’re confident it will stand up to the test of time.
It’s worth giving it a go.
OUR RESOURCES
If you’re interested, here’s our resources.
FAN INSTALLATION VIDEO
COMING SOON!
STL FILE
Here’s our STL file (this fits our 2021 Renault Master L2H2 van).